The Waze community has created the following plugins/extensions/addons for use in the Waze web-based environments. See Browser requirements and instructions.
Please be aware that these scripts commonly require updates in order to properly work after new releases of the Waze products. While some may update automatically once their authors make changes, others may require manual updating on your part.
Common Scripts Repository for Developers & End Users
Browser requirements
General installation instructions 

Click Expand for details on general installation info for specific browsers, and the Tampermonkey, and Greasemonkey script managers. (Chrome / Blink / Opera Next / Firefox / Mozilla / Internet Explorer / Safari)
Chrome / Blink / Opera Next
You might need to enable Developer Mode on your browser.
- If a download is available from the Chrome Web Store, choose that.
- Without an add-on to manage scripts, simply download the script file (.js) or Chrome executable package (CRX). Then drag and drop the file into the Chrome Extensions Tab [chrome://extensions] of the browser.
- Install TamperMonkey or equivalent.
Firefox / Mozilla
- Install Greasemonkey.
Internet Explorer
- Install Greasemonkey or equivalent.
Safari
- Install script as an extension.
- Install WazeBar for Safari.
Greasemonkey or Tampermonkey add-on for script management
The easiest way to load and manage add-on scripts is with Greasemonkey, Tampermonkey, or an equivalent browser add-on for script management. When you install a user script, the script manager catalogs it and automatically runs it anytime any page for which it is declared is loaded by your browser.
Map Editor presentation enhancements
WME Color Highlights 


This content is transcluded from a nugget source ![]()

This script adds color highlighting to segments and landmarks according to their status and type or other criteria. The highlighting of segments is likely to be most useful, for it shows locked and nameless roads. Traffic locks highlight is available where applicable.
↓ DOWNLOAD ↓
- from greasyfork (older versions from userscripts.org).
- from Chrome Web Store.
| Bring up comments or questions on this page in this forum |
WME Highlighter City 

Validates the contents of the city field in some countries with a color highlight.
This content is transcluded from a nugget source ![]()
Highlighter City (HiLiCi) is a derivative of WME Color Highlights v. 1.7.2. It checks for some countries (Austria, Switzerland, Germany, Liechtenstein, Norway, Australia, France, Mexico, Italy and Puerto Rico) the correctness of the content of the city field. If you want this feature for your country, ask.
Please note that this conflicts with WME Color Highlights; both should NOT be active at the same time.
↓ DOWNLOAD ↓
| Bring up comments or questions on this page in this forum |
WME Level Highlighter 

This script uses color highlights to show segment Elevation.
This content is transcluded from a nugget source ![]()
This WME script highlights segments based on Elevation (fka Level). Please note that this script conflicts with WME Color Highlights script; both should NOT be active at the same time.
↓ DOWNLOAD ↓
WME Junction Angle info 


This content is transcluded from a nugget source ![]()


patched by AlanOfTheBerg (PM [Help]) ![]() ;
;
contributed to by
- tkr85 (PM [Help])

- berestovskyy (PM [Help])

- FZ69617 (PM [Help])

- wlodek76 (PM [Help])

- seb-d59 (PM [Help])

As of July 2018[update], the current version is 2.0.7.
Routing instruction guessing works mostly, but bug reports with permalink and description are welcome ;)
↓ DOWNLOAD ↓
- (userscripts replacement)
- from Chrome Web Store.
- from GitHub
- from Mozilla for Firefox (Slightly outdated, working on some fixes to make the validator happy)
| Bring up comments or questions on this page in this forum |
UR Overview Plus (URO+) 

URO+ adds a URO+ tab in the left-hand panel to provide various filtering options to URs, MPs, and cameras. It also modifies UR icons, and provides optional pop-ups on the map with various details, and links.
This content is transcluded from a nugget source ![]()
by Twister-UK (PM [Help]) ![]()
- URO+ adds a URO+ tab in the left-hand panel to provide various filtering options to show/hide update requests, map problem, and camera markers according to type, age, comment keyword, etc.
- For any UR markers where a conversation is taking place, the marker is modified to show a small quote icon in place of the Waze icon. The quotes are on a green background or if you have commented on the UR, a yellow background. Optionally, a small circle with the count of comments can be shown too.
- For any markers that are visible, hovering the mouse pointer over the marker generates a pop-up which contains a summary of the marker information and some marker-type specific actions (e.g., opening an update request in a new tab, deleting a camera).
- Optional functionality (Go to subtab Misc, "Enable integrated scripts"):
- Functionality from DrivesTabEnhancer (DTE) script:
- Modifies the Drives tab in the left-hand panel to show more drives per sub-page (up to the WME limit of 50/page), and to inform the user which drives are available to view on the map as a route trail. Although Waze stores the drive summaries (date, distance, etc) for every drive ever made, it stores the actual route data only for the most recent drives.
- Functionality from Select Roundabout Segments (SRS) script.
- Adds a Select roundabout button to the segment edit panel when a single segment from a roundabout is selected. Clicking the button selects the entire roundabout. Note that if the entire roundabout doesn't get selected, it probably means the roundabout itself is broken.
- Functionality from DrivesTabEnhancer (DTE) script:
↓ DOWNLOAD ↓
| Bring up comments or questions on this page in this forum |
URComments 


This content is transcluded from a nugget source ![]()
by dBsooner (PM [Help]) ![]() through WazeDev. WazeDev owns the script and all information attached to it.
through WazeDev. WazeDev owns the script and all information attached to it.
On this page, you will find a brief overview of the features of the WME URComments-Enhanced script. Within WME, holding the mouse over any of the items will show tool tips describing the function or displaying the text to be used.
Note: URC-E is a replacement for URC and URC companion add-on scripts. With URC-E you no longer need URC or any of the different comment list add-on scripts. All current add-on scripts have been ported and work natively within URC-E. You may disable and/or remove URC and the add-on scripts. However, if you use your own "Custom" local list, you will still need to keep that add-on installed and enabled to use the "Custom" drop down. Hey, this could be a time to discuss converting to the new system? *wink* *wink*
Note 2: All features that URO+ applies to URs (filtering, map marker replacement, mouseover tooltip popup, etc.) have been included in URC-E.
Updates
Version: 2019.08.27.01
Assistance
Should you require any assistance on this script, or want to propose new features, please post a message in the following forum thread: URC-E (in English).
Features
Primary Features
- Comment lists are maintained by list owners via a Google Sheet. Changes made are instantly live within URC-E. No need to update the script for a comment change.
- 100% I18n translations compliant. NOTE: Translators needed! Please PM or Discord DM dBsooner if you are fluent in any language other than English and wish to help!
- Auto switch comment list: Automatically switch to the comment list designated for the area the UR is in, if there is a list associated with the area. Opening a UR in an area that does not have a list associated will use the ""Comment List"" you have selected above.
- Two UI styles: Default and UR Style
- Tag email: Some comment lists have specific comments that use a replacement tag. The replacement tag is used to specify an email address to send correspondence to. If you are setup to use one of these email addresses, please specify it here. If not, leave it blank.
- Comment List drop down on Comment list tab: You can change the currently loaded comment list using this drop down. Changing this drop down will not be saved as a setting and will not change your default list (located on the settings tab). This is only to allow you to quickly switch between lists.
- Enable append comment mode: Enabling append comment mode will allow you to append a comment to the existing text in the new-comment box. The comment is appended with a blank line between the existing text and the new text. The status of the UR is set to the status of the new comment you clicked to append. If the comment would end up being longer than 2000 characters, append mode will give a warning and not alter the text in the comment box, but the status would have been changed.
- Per comment list settings: The settings located in this box are customizable per comment list. By default, all comment lists use the "URC-E Master Settings" setting for each of the "Per comment list" settings. The box on the far right is the "Use URC-E Master Setting setting" for each given setting and list. (See more info below)
- Restriction system: Gives the ability for region leadership to enforce certain features to be enabled or disabled. Region leadership has the option of enabling this system by state or country.
- Tools tab:
- Backup / restore / reset settings system - Backup your settings to a JSON file. Restore settings from this JSON file (do not modify the JSON file directly!). Reset URC-E back to default settings (pretty much everything disabled).
- Create your own custom comment list with a Google spreadsheet!
- Convert your current custom comment list to a Google spreadsheet!
- Custom variables! See end of this post.
WME UI Tweaks
- Widen UR Panel to 300px to keep 'Submitted on' date from wrapping.
- UR marker pill with # comments, # days ago, etc. (See Marker preferences)
- UR marker replacement with URO+ style marker icons for tagged URs.
- URO+ style marker mouse-over tooltip popup with some additions:
- Added "First comment: X days ago by editor_name (rank)"
- Added "Last comment: X days ago by editor_name (rank)"
- Added "Reporter has commented: Yes/No
- Changed line breaks and spacing.
- Added (UR ID) to header title of UR panel.
- Added (x days ago) to each comment in UR panel.
- Replace Next UR with Done OR hide altogether (in UR panel).
- Added shortcuts to UR Panel for text insertion. See the end of this post for list.
URC-E Preferences
- Auto center on UR: Auto center the map to the selected UR at the current map zoom level.
- Auto click open, solved or not identified: Suppress the message about recent pending questions to the reporter and then, depending on the choice set for that comment, automatically select Open, Solved or Not Identified.
- Auto close UR panel: Automatically close the UR panel after you click send on a comment.
- Auto save after solved or NI comment: If 'Auto Click Open, Solved or Not Identified' is also checked, this will automatically click the save button after you click send on a comment that set the UR to Solved or Not Identified.
- Auto send reminders: Automatically send the reminder comment to the URs in the map window (as you pan around) you were the last to comment on and it has reached the days specified in 'Reminder Days'. !!WARNING!! AUTOMATICALLY SEND REMINDERS at the reminder days setting. This only happens when they are visible on your screen. NOTE: When using this feature you should not leave URs open unless you asked a question that needs a response from the reporter, as this script will send reminders to all open URs after 'Reminder days'.
- Auto set new UR comment (without description): Automatically set the default UR comment for the UR type on new (do not already have comments) URs that do not have descriptions.
- Auto set new UR comment (SLURs): Automatically set the default UR comment for new (do not already have comments) SLURs.
- Auto set new UR comment (with description): Automatically set the default UR comment for the UR type on new (do not already have comments) URs that do have descriptions.
- Auto set reminder UR comment: Automatically set the UR reminder comment for URs that are older than the 'Reminder days' setting and have only one comment.
- Auto switch to the URC-E tab: Automatically switch to the URComments-Enhanced tab when opening a UR. When the UR panel is closed you will be switched back to your previous tab.
- Auto zoom in on new UR: Automatically zoom in when opening new (no comments) URs.
- Auto zoom out after comment: Automatically zoom the map back to the previous zoom after clicking clicking send on a UR comment.
- Disable Done / Next UR button: Disable the done / next buttons at the bottom of the UR panel.
- Replace Next UR button with Done: Replace the Next Update Request button with a Done button.
- Double click link - Not Identified comments: Add an image (extra link) to the 'not identified' comments. When double clicked it will automatically set and send the UR comment of the one you double clicked, and then launch all of the other options that are enabled.
- Double click link - Open comments: Add an image (extra link) to the 'open' comments. When double clicked it will automatically set and send the UR comment of the one you double clicked, and then launch all of the other options that are enabled.
- Double click link - Solved comments: Add an image (extra link) to the 'solved' comments. When double clicked it will automatically set and send the UR comment of the one you double clicked, and then launch all of the other options that are enabled.
- Hide zoom out links: Hide the zoom out links on the comments tab.
- Unfollow UR after send: Unfollow the UR after sending a comment.
- Enable UR overflow handling: If this setting is enabled and there are more than 499 URs on the screen, URC-E will attempt to gather more URs and add them to the map, if they do not already exist. WME does not display more than 500 URs on a single screen on its own. This setting follows the WME Layer setting for hide / show closed URs.
- Enable auto refresh on zoom / pan: Reloads the map data when zooming or panning to show URs that may have been missed due to WME's 500 UR limit. Will only reload if the zoom level is between 3 and 10, there are not pending edits, and there are more than 499 URs loaded.
- Tag email: Some comment lists have specific comments that use a replacement tag. The replacement tag is used to specify an email address to send correspondence to. If you are setup to use one of these email addresses, please specify it here. If not, leave it blank.
- Reminder days: Number of days to use when calculating UR filtering and when setting and/or sending the reminder comment. This is the number of days since the first comment. Set to 0 if you do not use reminders.
- Close days: Number of days to use when calculating UR filtering. This is the number of days since the last comment. Example: If you close 4 days after the last comment, set to 4. Anything less than this time will be considered 'waiting' as long as there is at least one comment already.
- Custom tagline: This is to allow users to have a single "tagline" that can be added to the end of each comment they want. A managed list might use this and tell you what to do. An example of a custom tagline: "If you still have issues after this report is closed. Please feel free to email me at my@email.com." Then a comment would have the variable $CUSTOMTAGLINE$ in it and would insert your tagline there. The custom tagline is a "per comment list" setting. Meaning you can have a different one for each comment list, or have them use the "master" setting.
UR Marker Preferences:
- Enable UR pill counts: Enable or disable the pill with UR counts on the map marker.
- Disable UR marker popup: Do not show the UR popup tooltip when you mouse over a UR marker.
- UR marker popup delay: The number of milliseconds (* 100) to delay before the UR marker tooltip will be displayed.
- UR marker popup timeout: Specify the number of seconds to leave the UR marker tooltip displayed, while hovering over the marker. Leaving the marker, unless to the tooltip itself, will cause the tooltip to close. Entering the tooltip will cancel the timer and leaving the tooltip will close the tooltip. Double click to quickly close.
- Don't show tag name on pill: Do not show the tag name on the pill where there is a tag. Example: [NOTE]
- Replace tag name with editor name: When a UR has the logged in editors name in the description or any of the comments of the UR (not the name Waze automatically adds when commenting), replace the tag type with the editors name.
- Unstack markers: Attempt to unstack markers by offsetting them. Similar to how URO+ unstacks markers. Markers not involved in the current "stack" will be temporarily hidden until restacking.
- Unstack sensitivity: Specify the sensitivity for which markers are considered stacked. Default: 15.
- Unstack disable when zoom level <: Disabled unstacking when zoomed out wider than the specified zoom. Default: 3.
- Use Custom Markers for: Replace default UR marker with custom marker for the URs with these tags in the description or comments:
- [BOG] / [BOTG]
- [CLOSURE]
- [CONSTRUCTION]
- [DIFFICULT]
- [EVENT]
- [NOTE]
- [ROADWORKS]
- [WSLM]
- Native speed limits
- Custom: You specify.
UR Filtering Preferences
- Enable URC-E UR filtering: Enable or disable URComments-Enhanced built-in UR filtering.
- Invert filters: When enabled, changes all filters to be "show" instead of "hide".
- Hide outside editable area: Hide URs outside your editable area.
- Do not filter tagged URs: Do not filter URs that are tagged with a [] tag. Example: [NOTE]
- Do not hide selected UR: Do not hide a UR if it is currently being selected.
- Disable filtering when zoom level <: Disabled UR filtering when zoomed out wider than the specified zoom level. Set to '0' to enable all filtering.
- Disable filtering when zoom level >: Disable UR filtering when zoomed in tighter than the specified zoom level. Set to '10' to enable all filtering.
- Hide/show by lifecycle status:
- Waiting: If you use reminders (Reminder days > 0), waiting is any UR with more than 1 comment and less than the close days from the last comment. I.E. The URs that do not need work.
- Close needed: Any UR with more than 1 comment (if using reminders) or at least 1 comment (if not using reminders) and last comment is older than close days ago.
- Reminders needed: If using reminders, any UR with only 1 comment and that comment was greater than reminder days ago.
- Hide/show by status: Hide/show URs by their current status.
- Open
- Closed
- Not identified
- Solved
- Closed by: Command separated listed of username(s).
- Hide/show by type: Hide/show URs based on their Waze UR type (note some of these are not used by Waze at the moment).
- Closed road
- General error
- Incorrect address
- Incorrect junction
- Incorrect route
- Incorrect street prefix or suffix
- Incorrect turn
- Missing bridge overpass
- Missing exit
- Missing Place
- Missing or invalid speed limit
- Missing road
- Missing roundabout
- Missing street name
- Turn not allowed
- Undefined
- Waze automatic
- Improper / Poor navigation instructions
- Hide/show by tagged: Hide/show all URs with the specified TAG in description or comments.
- [BOG] / [BOTG]
- [CLOSURE]
- [CONSTRUCTION]
- [DIFFICULT]
- [EVENT]
- [NOTE]
- [ROADWORKS]
- [WSLM]
- Hide/show by age of submission:
- Less than days: Hide/show URs that were originally created less than specified number of days ago.
- More than days: Hide/show URs that were originally created more than specified number of days ago.
- Hide/show by description, comment, following:
- Following / Not following: Hide/show URs you are following or not following.
- Description With / Without: Hide/show URs with or without descriptions.
- Comments from me With / Without: Hide/show URs with or without comments from you.
- First comment by me Yes / No: Hide/show URS where the first comment was by you or not by you.
- Last comment by me Yes / No: Hide/show URs where the last comment was by you or not by you.
- Last comment by reporter Yes / No: Hide/show URs where the last comment was by the reporter or not.
- Less than comments: Hide/show URs that contain less comments than the number specified.
- More than comments: Hide/show URs that contain more comments than the number specified.
- First comment less than days: Hide/show URs where the first comment is less than the days specified ago.
- First comment more than days: Hide/show URs where the first comment is more than the days specified ago.
- Last comment less than days: Hide/show URs where the last comment is less than the days specified ago.
- Last comment more than days: Hide/show URs where the last comment is more than the days specified ago.
- Including keyword: Hide/show URs that include the custom word / text specified.
- Not including keyword: Hide/show URs that do not include the custom word / text specified.
- Case-insensitive keyword matches: If enabled, searching for the above including or not including keywords will be done using case insensitive searching.
- With comment by: Hide/show URs that have been commented on by the specified user(s). Use a comma (",") to separate usernames.
- Without comment by: Hide/show URs that have note been commented on by the specified user(s). Use a comma (",") to separate usernames.
The per comment list settings additionally have the following occurring on them:
- When you check / uncheck the "Use URC-E Master Settings setting" checkbox for a given per comment list setting, URC-E will update that per-comment list setting to match what is currently set for the URC-E Master Settings setting.
- When you change a per comment list setting, it is only changed for the currently loaded / selected comment list. These settings are saved with all other settings.
- When you change one of the URC-E Master Settings settings that also have a matching per comment list setting, URC-E will go through all your "per comment list" settings and update the changed setting for any lists that have the given setting set to "Use URC-E Master Settings setting".
Custom variables
Allows you to create your own custom variables to use throughout your comments. Custom variables can be nested. If you are a URC-E master control comment list maintainer, your tab has already been setup to allow for this. If you have your own custom sheet, you will need to modify your "Data validation" for column C (URSTATUS) to allow "CUSTOM VAR" to be a valid option. To use:
- Set the title (column A) to the variable name you would like to use. WITHOUT the $'s.
- Ex: CUSTOM_GREETING
- Set the "Comment" (column B) to be the replace text you would like to use.
- Ex: Good $CURRENTDATE_TIME_CASUAL$! I am a fellow Wazer like you!
- Set the "URSTATUS" (column C) to be "CUSTOM VAR".
- Wherever you want to use this variable in your other comments, simply place the name wrapped in $'s in the comment.
- Ex: $CUSTOM_GREETING$ I see you reported a $URTYPE$ issue near $SELSEGS_WITH_CITY$. Would you mind telling me more information that might help me assist with solving the issue? ...
Custom tagline
This is to allow users to have a single "tagline" that can be added to the end of each comment they want. A managed list might use this and tell you what to do. An example of a custom tagline: "If you still have issues after this report is closed. Please feel free to email me at my@email.com." Then a comment would have the variable $CUSTOMTAGLINE$ in it and would insert your tagline there. The custom tagline is a "per comment list" setting. Meaning you can have a different one for each comment list, or have them use the "master" setting.
Shortcuts in the UR Panel (and their variables to use in sheets)
- Current date (Calendar icon (left side) or variable $CURRENTDATE_DATE$): Inserts the current date with 2-digit day, 2 digit month and 4 digit year in the current locale format.
- Current date casual (Calendar icon (right side) or variable $CURRENTDATE_DATE_CASUAL$): Inserts the current date as full month name and 2 digit day in the current locale format.
- Current day of week (Sun icon or variable $CURRENTDATE_DAY_OF_WEEK$): Inserts the current day of the week in the current locale language.
- Current time (Clock icon (left side) or variable $CURRENTDATE_TIME$): Inserts the current time in 2 digit hour, 2 digit minute and abbreviated timezone, in the current locale.
- Current time casual (Clock icon (right side) or variable $CURRENTDATE_TIME_CASUAL$): Inserts current time in casual, translated in current locale if available, according to:
- 04:00am-11:59am: morning
- 12:00pm-05:59pm: afternoon
- 06:00pm-08:59pm: evening
- 09:00pm-03:59am: night
- Custom tagline (Tag icon or variable $CUSTOMTAGLINE$): Inserts the custom tagline for the currently loaded comment list, or replaces it with nothing if blank.
- Drive date (Calendar icon (left side) or variable $DRIVEDATE_DATE$): Insert the drive date into the new comment box at the cursor position (2-digit month, 2-digit day, 4-digit year in locale format).
- Drive date casual (Calendar icon (right side) or variable $DRIVEDATE_DATE_CASUAL$): Insert the drive date into the new comment box at the cursor position (full month name, 2-digit day in locale format).
- Drive date full casual (Calendar with + icon (right side) or variable $DRIVEDATE_TIME_CASUALMODE$): Insert the drive date into the new comment box at the cursor position with the following table as a reference (in locale translation):
- 0 days: this morning, this afternoon, this evening, tonight
- 1 days: yesterday morning, yesterday afternoon, yesterrday evening, last night
- 2-6 days: Day_of_Week morning/afternoon/evening/night
- 7-13 days: last Day_of_Week morning/afternoon/evening/night
- 14-20 days: Day_of_Week before last
- 21-27 days: three weeks ago
- 28-60 days: a few weeks ago
- 61-120 days: a couple months back
- 121+ days: a while ago
- Drive day of week (Sun icon or variable $DRIVEDATE_DAY_OF_WEEK): Insert the drive date day of the week into the new comment box at the cursor position (full day of week name in locale language).
- Drive time (Clock icon (left side) or variable $DRIVEDATE_TIME$): Insert the drive date time of day into the new comment box at the cursor position (2-digit hour, 2-digit minute in locale format).
- Drive time casual (Clock icon (right side) or variable $DRIVEDATE_TIME_CASUAL$): Insert the drive date time of day into the new comment box at the cursor position (in locale language).
- 04:00am-11:59am: morning
- 12:00pm-05:59pm: afternoon
- 06:00pm-08:59pm: evening
- 09:00pm-03:59am: night
- Place address (Pin icon or variable $PLACE_ADDRESS$): Inserts the address, with city and state (as appropriate) for the currently select place.
- Place name (House icon or variable $PLACE_NAME$): Inserts the name of the currently selected place, or "residential place" (in the current language) if it is an RPP.
- Selected segments (Road icon or variable $SELSEGS$): Either replaces '$SELSEGS$' (or '$SELSEGS)' with the name of the currently selected segment(s), or it will insert the name of the currently selected segment(s) into the comment box at the cursor position.
- Selected segments with city (Road icon with + or variable $SELSEGS_WITH_CITY$): Same as $SELSEGS$, except includes the city name if 1) one selected segment and it contains a primary city 2) two selected segments and 2a) both have the same city as their primary OR 2b) one has a primary city and the other is set to "no city".
- UR description (Paragraph icon or variable $URD$): Insert the UR description into the new comment box at the cursor position.
- UR type: (Info icon or variable $URTYPE$): Inserts the UR type of the currently selected UR.
- Waze username (User icon or variable $USERNAME$): Insert your Waze username into the new comment box at the cursor position.
Comments
CALLING COMMENT LIST OWNERS: All the URC comment lists have been ported to URC-E. They are now manageable through the below Google Sheet link. If you are the original owner of the list, please contact me via PM or Discord DM. If you no longer wish to maintain the list, I need to know that as well. If you would like to maintain a list, please also contact me and I can try to get in touch with the owner.
NEW LISTS: If you are interested in having your own list included, please contact me. The best scenario would be to have lists for states / regions or countries. I am working with several regions currently and they are following a model I have created in the SCR that allows for a group of editors to combine their ideas together to create a region list.
Current comment lists
- Bahasa Indonesia: projectronic
- CommentTeam: CommentTeam (See list below) - Initial DEFAULT list
- Custom (for use by those that still have an addon static "custom" list)
- Custom G Sheet (for using your own custom comment list hosted in a Google Sheet)
- Dutch - Belgium: WimVandierendonck
- Dutch - Netherlands: moweez
- English - India: moweez
- English - International: moweez
- Estonian: matsalka
- French: Corentin-48, asph4lt
- German: Iridium1
- German - Austria: fuchserl
- Israeli Hebrew
- Italian: m4rc072
- Lithuanian: moweez
- Malaysia (en-zh-ms) - Rising_Sun
- Persian: babak_khd, BehnamNHappy, Shrm75
- Polish: mdymek
- Portuguese - Brazil: GibiruX_ - AUTOSWITCH for country Brazil
- Portuguese - Portugal
- Romanian: spookyx
- Spanish - Bolivia: crotalo
- Spanish - Chile: Gasparfox
- Spanish - Colombian: mincho77
- Spanish - Dominican: RafaCintron, mincho77
- Spanish - Ecuador: aamazotr
- Spanish - Mexico: arielorellana
- Spanish - Puerto Rico: cotero2002 - AUTOSWITCH for country Puerto Rico
- Spanish - Spain: huakayo
- Spanish - Venezuela: moweez
- Switzerland - DE: vince1612 (Auto-switch for states with DE language)
- Switzerland - FR: vince1612 (Auto-switch for states with FR language)
- Switzerland - IT: vince1612 (Auto-switch for states with IT language)
- USA - SCR: SCR CommentTeam - AUTOSWITCH for states Arkansas, Louisiana, Mississippi, Oklahoma and Texas
- USA - SER: itzwolf - AUTOSWITCH for states Alabama, Florida and Georgia
- USA - NOR: NOR CommentTeam
- USA - MAR: MAR CommentTeam
- User: PesachZ: PezachZ
↓ ↓
URC-E is available on the following browsers:
- Chrome: URC-E via TamperMonkey
| Bring up comments or questions on this page in this forum |
WME HardHats 


This content is transcluded from a nugget source ![]()

Changes the live user hard hats shown in the WME layer based of editor rank
- Green
- Light Blue
- Light orange
- Brown
- Blue
- Red
↓ DOWNLOAD ↓
| Bring up comments or questions on this page in this forum |
ShowTown 

Shifts the UR and MP Frames so they don't block the city name on the map.
This content is transcluded from a nugget source ![]()

Moves the UR and place update windows down 40px so the town name is not covered up!
↓ DOWNLOAD ↓
WME layout tweaking user style 

This is a stylesheet that works with stylish to reduce whitespace in WME.
This content is transcluded from a nugget source ![]()
by CrazyTerabyte (PM [Help]) ![]()
This is a custom stylesheet that tweaks the Waze Map Editor layout to reduce the amount of white-space and increase the editable area.
Custom stylesheets require that you first install the Stylish add-on. (Get Stylish for Chrome or Stylish for Firefox).
↓ DOWNLOAD ↓
WME LiveMap closures 


This content is transcluded from a nugget source ![]()
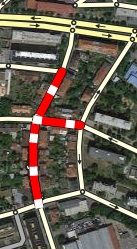
This scripts shows the closure lines from Live map in WME.
↓ DOWNLOAD ↓
| Bring up comments or questions on this page in this forum |
Street Vector Layer 

Street Vector Layer (SVL) the fully customizable vector road layer for the Waze editors, made by editors. Make WME look as you like!
This content is transcluded from a nugget source ![]()
by bedo2991 (bedo2991 PM [Help]) ![]()

Motivation
Current Waze road layer is generated on a Waze server and is just downloaded on the users' browsers. This script allows to locally generate a vector layer based on the Waze object model.
The layer is generated on the client side and therefore is fully customizable. Moreover it shows many more things than the standard layer, for example speed limits, road closures and segments' elevation.
Customization Panel
To open the script's settings, click on the attribution bar on the bottom left of the map. Don't forget to save before closing the panel, otherwise the changes will only have effect until you refresh the editor page.
↓ DOWNLOAD ↓
| Bring up comments or questions on this page in this forum |
Waze Edit Count Monitor 

Adds an edit count monitor to your WME header.
This content is transcluded from a nugget source ![]()

Adds an edit count to the header at the top right of the screen with the WME buttons. Updates after each save. Warns if you might be throttled (saves without edit count increase).
↓ DOWNLOAD ↓
WME ClickSaver 

Various UI changes to make side panel editing a little easier.
This content is transcluded from a nugget source ![]()
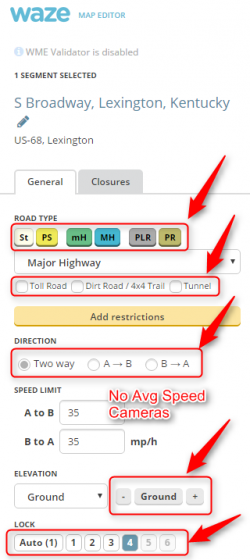
- Replaces two dropdown boxes and adds helper buttons for two others.
- Removes the Avg Speed Cameras section
- Moves the road attribute checkboxes inline.
There is also an options panel where you can turn each feature on/off.
↓ DOWNLOAD ↓
| Bring up comments or questions on this page in this forum |
Map Editing
You may not be granted edit points for making a large number of edits in a short time (usually only possible using scripts to edit).
|
WME Junction Node Fixer 

This script performs a handful of functions, triggered by the q key, fixing junctions and segments. It also tweaks the WME UI a bit.
This content is transcluded from a nugget source ![]()
Junction Node Fixer has several features. The primary focus of JNF is that it overloads the 'q' (disallowAllTurns) keyboard shortcut to preserve existing turn restrictions. 'Overloading' means that it takes over all functionality of the 'q' hotkey only. The 'q' keyboard shortcut performs the following actions
- Fixes any self and reverse connectivity issues
- Fixes closed loop roads (by splitting into two segments with a joining junction)
- Terminates dead-ends with a junction
- Makes dead-ends two-way (only if both ends of the segment are visible)
- Sets the Type of a roundabouts using lowest of two highest rule and sets country/state if needed
- For UK sets Type of roundabouts using highest type excluding Freeway rule.
- Does a traditional 'qw' (clears reverse connectivity, and locks turns)
- Causes the turn arrows to refresh (the side effect of 's' but without the shifting).
Since you end up with the same turns restricted, that means you need to press 'w' if you really want all turns allowed. This is why it overloads 'q' instead of 'w'. Ultimately this will be a separate hotkey that's editable through WME's '?' interface.
JNF also:
- Saves the state of WME's ShowAllTurns, ShowTurns, and Full-screen mode across Refresh/F5/Permalink.
- Forces data model reload after successful save.
This has been tested only in Chrome; it has been reported to work in Firefox with GreaseMonkey.
↓ DOWNLOAD ↓
| Comments or questions on any Wiki page can be brought up in the Wiki updates forum topic. |
WME Toolbox 


This content is transcluded from a nugget source ![]()
WME Toolbox
WME Toolbox is a browser extension originally written by OyyoDams (PM [Help]) ![]() that adds functionality to Waze Map Editor.
that adds functionality to Waze Map Editor.
It supports the Chrome and Firefox browsers.
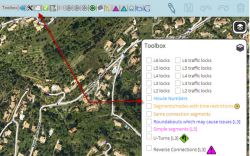
WME Toolbox extension for Chrome
WME Toolbox can be found and installed via the Chrome web store. Once installed, it will likely automatically update as needed, or it may alert you when a new version is ready.
If you've enabled auto update of your extensions in your Chrome browser, Toolbox should be automatically updated when a new version is ready. However, you can force extension update. Please refer to your browser manual for more information.
In case of error with update system, just remove WME Toolbox and install it again.
WME Toolbox Add-On for Firefox
Use this link to download the latest available Toolbox for FF.
WME Toolbox features
You may not be granted edit points for making a large number of edits in a short time (usually only possible using scripts to edit).
|
Since release 1.6.0 (June 2015), the permissions to use the individual tools can be set per country. The active permissions of the current release are listed in a GoogleDoc.
Toolbar
 Function to hide the left sidebar
 Toggle for Toolbox highlights
 Dynamic mini-map toggle
 Configuration panel for the plugin options
 Quick access to keyboard shortcuts editor
Select segments panel to enable multi-selection based on filters
 Select places panel
 Measurement tool for segments and places plus a basic ruler
 Properties editor panel to modify several segments at a time
 Copy segment attributes
 Clear road geometry
 Cut segment into two
 Select all roundabout segments
 Redo a roundabout
 Convert a roundabout to a standard road
 Draw area place inside of roundabout (to label it)
 Select segments in area place
 Suppress unneeded junctions on screen
 Suppress unneeded geometry on screen
 Delete expired restrictions (past ending date) on screen
 Auto add nodes to fix loops
 Auto fix unconfirmed turns
 Auto remove toll attribute on non freeway/ramp segments
 Auto fix reverse connections, dead-end and unterminated roads
 Auto fix u-turns
Highlight layers menu
- Highlight of level-locked segments
- Highlight of manual locks (greater, equal, less than automatic lock)
- Highlight segments with positive or negative elevation
- Highlight of segments with house numbers
- Highlight of named streets without any house number
- Highlight of segments/nodes with time restrictions
- Highlight of loops
- Highlight of roundabouts which may cause issues
- Highlight of U-Turns
- Highlight of reverse connections
- Highlight of Dead-end loops
- Highlight of soft turns
- Highlight of simple segments (which have unneeded geometry nodes)
And more
- Popups to help new editors on basic editing
- Option to hide user greetings on the left sidebar
- Option to force fullscreen
- New keyboard shortcuts for Toolbox features
- Enable shortcuts on numpad
- Reset elevation to ground
- Pan the map from screen size
- Forum Private Message check
- Layer-less PermaLink creation
- Hover PL, Press & Release Shift, Press Ctrl + C
Download links
Toolbox is available for:
| English: Script WME Toolbox forum thread Français: Script WME Toolbox discussion dans le forum |
WME Roundabout Angles 

The WME Roundabout Angles script can help in designing normal roundabouts. It draws angles for typical roundabouts and overlays a round helper line to adjust the geometry of a roundabout.
This content is transcluded from a nugget source ![]()
by wlodek76 (PM [Help]) ![]() , currently managed by FZ69617 (PM [Help])
, currently managed by FZ69617 (PM [Help]) ![]()
The script provides guidance based on the rules described in the USA roundabouts wiki page.
The original authorship of the script is by wlodek76, who decided to leave the Waze community (hopefully, not forever...).
The rights for further maintenance of the script have been granted by the original author to FZ69617 (PM [Help]) ![]() (forum profile).
(forum profile).
Brief instructions:
- Activate the script by enabling the "Roundabout Angles" layer in WME
- The default is inactive, therefore the script will always be off when you reload WME. It must be activated again each time its needed (after reloading WME).
- The script will automatically find all roundabouts visible on the map - pan and / or zoom the map, if it doesn't find them.
- Angles will only be displayed for roundabouts with four or less nodes. The other roundabouts will still display the round helper line in a slightly different color, together with a line to the first three nodes, but no angles will be displayed.
↓ DOWNLOAD ↓
- from GreasyFork.org --last updated 2014-10-02
| Bring up comments or questions on this page in this forum |
WME Aerial Shifter (WAS) 


This content is transcluded from a nugget source ![]()
by byo (PM [Help]) ![]() ; patched and packaged by berestovskyy (PM [Help])
; patched and packaged by berestovskyy (PM [Help]) ![]()
version 1.3.2 (Oct 07, 2013)

Generally the GPS points layer will be displayed on the map at a location parallel to the visual roadway. Adjust the settings in this script until the GPS points are aligned with the visual map. Different sections of the map may or may not have this same amount of misalignment, so it is best to use this same technique in other areas before you use the same offset as a prior area.
Before downloading a new version, uninstall or disable all previous versions of this script.
↓ DOWNLOAD ↓
| Bring up comments or questions on this page in this forum |
Street to River PLUS 


This content is transcluded from a nugget source ![]()
by EduardoCarvajal (PM [Help]) ![]() ; based on the script by aeytom (PM [Help])
; based on the script by aeytom (PM [Help]) ![]()
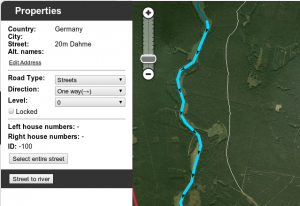
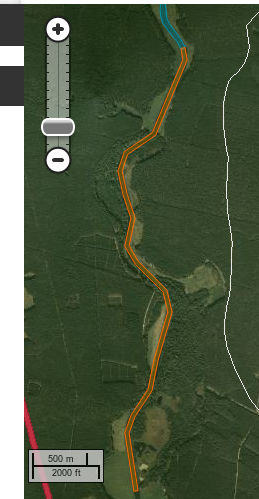
The script is designed as a helper for creating river landmarks for the free Waze navigation system. The script transforms the geometry of a new unsaved street to a river landmark. You can predefine the width and the name for the new landmark in the form of a special street name.
Mini how-to:
To add a new river:
- Install this script and go to WME.
- Draw a new street but do not save the street.
- Add and apply a street name to define the rivers name and width. This step is optional.
- Example: 20m Spree creates a 20 meters wide river named Spree
- Select the helper street.
- Click the Street to river button.
- Delete the helper street.
- Edit the new landmark as you like. You can even set the landmark to another type. Here it is used to mark a railroad, using landmark type 'other'.
To expand an existing river:
- Draw a new Street that starts inside an existing river, but do not save the Street.
- Make sure that you see on map the beginning of the Street (the intersection point of the street and the river)
- Select the helper Street.
- Click the "Street to river" button.
- Delete the helper Street.
- Edit the new landmark as you like.
Examples of rivers created by the script are Sixaola River and Telire River.
Multilingual interface: English, Spanish, Portuguese, French, Russian, Hungarian and Czech.
↓ DOWNLOAD ↓
| Bring up comments or questions on this page in this forum |
WME center to begin-end of street 


This content is transcluded from a nugget source ![]()


The script adds the ability to center the map at the beginning or end of the currently selected segment. The ends are selected with the A and B buttons. The script also remembers the last map position and zoom level before pressing either A or B. That feature is accessed with the return button. The X button will clear the last map position until A or B is pressed again (setting a new remembered map position).
↓ DOWNLOAD ↓
| Bring up comments or questions on this page in this forum |
WME Road Selector 

Makes selection of multiple roads based on given condition
This content is transcluded from a nugget source ![]()

Do you sometimes need to select multiple segments based on some condition?
This script does this work for you.
↓ DOWNLOAD ↓
| Bring up comments or questions on this page in this forum |
WME Magic Wand 

The very same thing as same tool in graphic editor: select "similar" colored area and create landmark out of it + Clone, Orthogonalize, Rotate and Resize options for landmarks.
This content is transcluded from a nugget source ![]()
Features
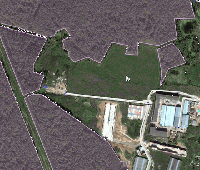
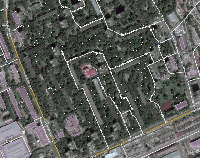
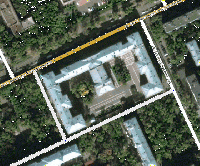
- Magic wand tool - the very same thing as in Photoshop: point on a pixel on the map, click and the tool will create a landmark covering whole area of the same color (see example GIF here)
- Clone landmark (see GIF example here). With this simple tool plus rotate and resize feature (below) you can create dozens of houses in a minute! Press Ctrl (Cmd) + C to Clone.
- Orthogonalize landmark corners - same tool as many of you have seen before in OpenStreetMaps iD editor, will make "almost" straight corners of the selected landmark perfectly straight thus making a beautiful landmarks in mobile clients :) See example here. Press Ctrl (Cmd) + X to Orthogonalize selected landmark.
- Rotate and resize landmarks option (GIF example)
WME MagicWand has been tested in Chrome and Firefox.
Usage
Advanced editing tools
Clone landmark
Select a landmark you want to clone and press "Clone landmark" button on the left hand menu or use Ctrl (Cmd) + C shortcut. The landmark will be cloned with a same venue type but otherwise empty.
Orthogonalize landmark
Select a landmark and press "Orthogonalize" button on the left hand menu or use Ctrl (Cmd) + X shortcut. This algorithm will try to make "about" straight corners really strait to avoid ugly look in Waze client.
Options for Rotation and Resize
- Open the MagicWand tab in the left menu;
- Check or uncheck boxes to enable or disable Rotate and Resize functionality;
- Select landmark;
- ROTATE: drag the additional landmark's vertice to rotate it;
- RESIZE: drag the additional landmark's vertice to resize. Please note that when RESIZE option is enabled you cannot modify individual vertices.
Magic Wand tool
- Open the MagicWand tab in the left menu;
- Choose the type of the supposed landmark (can be changed later);
- Toggle MAGIC WAND button: red means ACTIVE state;
- Click somewhere in the area you'd like to be converted to landmark based on the color (best work with farmland, water, building and forests);
- Wait a bit (the actual time depend on your computer) for landmark to be created;
- Edit the created landmark to fine tune the area.
What does all that options mean?
Color match algorithm - WME MagicWand can use two different algorithms to detect similar pixels on the tiles: based on color "distance" and based on "human-eye similarity". Choose the best suitable option for you but please keep in mind that when changing algorithm you will need to play with Tolerance option too as both algorithms uses it differently.
Tolerance option basically changes sensitivity of the algorithm, what pixels would be supposed to have "similar" color. Large values will select all pixels -- that is not what you want :)
Landmark simplification - as map tiles contains tons of pixels of different color finding appropriate polygon to contain all of "similar" pixels is a difficult computational problem. Current implementation uses one of convex hull algorithms to do it. The problem is that it creates many points on the curves and corners and thus you can use simplification parameter to remove unnecessary points automatically.
Notes
- Please wait when map tiles will be fully loaded after moving or zooming to make plugin work properly.
- As WME MagicWand uses convex hull to approximate the area it is not able to correctly select difficult concave landmarks. I was not able to implement concave hull algorithm yet and I will really appreciate any help anyone can give me :)
- As far as I understand we can make the script more accurate if it will compare not individual pixels but certain groups, say 5x5 or 10x10. Need an advice about it though.
I'm really open for any suggestions and comments :)
Installation
- Download script using Install button in the right top corner;
- Open Options -> Tools -> Extensions page;
- Drag & Drop downloaded file to Extensions page.
↓ DOWNLOAD ↓
| Bring up comments or questions on this page in this forum |
Map validation and routing
WME Route Checker 


This content is transcluded from a nugget source ![]()


This script allows you to see the current navigation instructions in the editor.
Simply select two segments, and choose your desired settings in the secion that appears on the left (above the segment details). Then click the purple link to "Show routes between these two segments»"
↓ DOWNLOAD ↓
| Bring up comments or questions on this page in this forum |
WME Route Speeds (Traffic) 

This script displays route speeds on selected segments in WME with many options. It uses the speed data from Live Map and displays the recorded speed at the time of the route request or from a particular time of the week.
This content is transcluded from a nugget source ![]()
Initially developed by wlodek76 (PM [Help]) ![]() , now under development by a new team.
, now under development by a new team.
To use:
- Find the "Route Speeds" tab somewhere after your drives tab.
- Multi-select two segments connected to each other.
- Switch back to the Route Speeds tab
- You may now drag and drop the "A" and "B" markers.
- You may also start a route by specifying lat/long coordinates, and you may copy these coordinates from route speeds to test the same route again later.
↓ DOWNLOAD ↓ Installation Requirements: Tampermonkey (Chrome) or Greasemonkey(Firefox)
- from GreasyFork.org (DONT USE IF IT'S MORE THAN 2 YEARS OLD.)
- mapomatic update
- MapOMatic fork) This is probably best version.
| Bring up comments or questions on this page in this forum |
WME Validator 


This content is transcluded from a nugget source ![]()
by Berestovskyy (PM [Help]) ![]()
contributor JustinS83 (PM [Help]) ![]()

- Validator reports issues for your country and provides links to the country wiki. See How to adjust Validator for your country.
- Validator highlights issues not features. For example, it highlights not just any locked segment, but only if the lock is an issue.
- There are many country-specific checks on every segment. See complete list of validations.
- You may define your own custom checks as well. (Forum discussing custom validations.)
Validator is BETA software. Please report any issues/suggestions in the forum thread.
↓ DOWNLOAD ↓
| Bring up comments or questions on this page in this forum |
WME Speedhelper 

Makes adding/verifying speed limits easy & quick.
This content is transcluded from a nugget source ![]()
by GertBroos (GertBroos PM [Help]) ![]()

WME Speedhelper has made inputting speed data easy, with the use of handy speedsign images. You just need to select one or more segments and click the speed you want. If a segment isn't yet verified, don't worry, these checkboxes will be automatically checked.
Country missing?
If your country isn't supported yet, let me know by following the forum link at the bottom and let me know the following details:
- Country name & Waze abbreviation
- Requested speeds (please use a comma-separated list)
- Kmh or mph?
- A link to the design of your country's speedsign (only needed if it's not a red circle/white background/black text = default)
↓ DOWNLOAD ↓
| Bring up comments or questions on this page in this forum |
WME Chat
WME Chat addon 


This content is transcluded from a nugget source ![]()
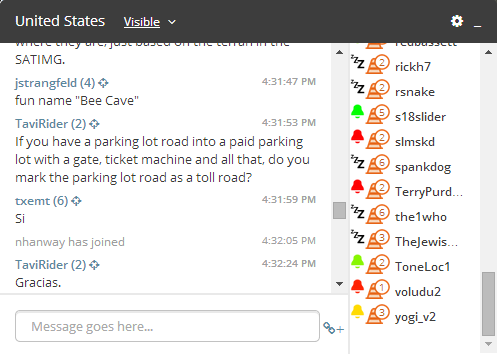
This script changes the chat GUI to add more functionality to the chat window:
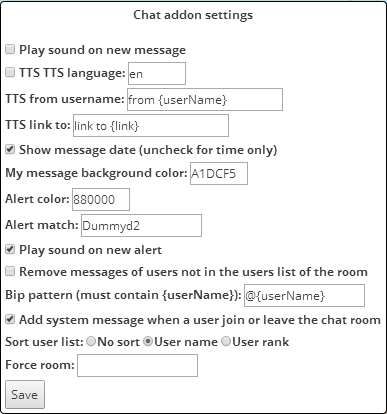
- Removes duplicate messages (hide only, this is not a fix for WME bug)
- Adds TTS functionality for incoming messages in any language supported by Google
- Find the language code in the Google Translate URL in between /#en/ , the letters in the place of en are the language code
- Customize the prefix text for messages and links in settings
- Make links clickable, and opens in new tab
- Transforms permalinks into clickable target without reloading WME.
- Hover over the link to see how elements v(segments, nodes, venues) are included in the permalink.
- Small "+" and permalink icon next to the input message area to insert current permalink
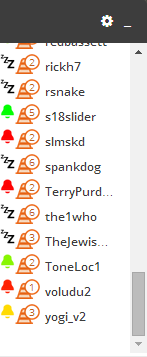
- Bell or Zzz icon next to each user in the users list to insert the "bip" in the message (insert a text containing the username, customisable in settings)
- Bell icon changes to reflect recent activity status (movement on map, or chat message post). Activity within the past 5 minutes = Green -> Red gradual change, after 20 minutes = Zzz.
- Top bar is made light grey when invisible
- You can use smileys: :) :D ;) :( :o :? 8-) :x :P :|
- “Settings button (gear)” on top bar, near minimize button on right side includes options to:
- Remove messages of users not in the room
- Post a system message when a user joins or leaves the room
- Sort user list by user name, rank, and/or activity (username for secondary sort)
- Force room connection when editing near country boundaries
- Messages are manipulated to:
- Make live usernames clickable to send “bip”
- Show a target link next to the username in a message to jump to their location
- Show rank of user next to username
- Show date and time or only time of post (available in settings), in small font size, grey, and right aligned
- Play sound on new message (mutable in settings)
- New messages posted by you have a light blue background (adjustable in settings "My message background color")
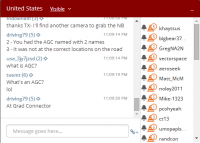

- Alerts:
- Chat top panel (if open) or chat button (if closed) change color to dark red (color adjustable in settings) if someone type a message containing any of your keywords (case insensitive).
- Keywords are set in settings, the default is your username but you can add others separated by a comma “,”. (See tool tip text in settings)
- Alert keywords in message are highlighted
- Alert color returns back to original color when you send a message, close chat window, or click on highlighted keyword
- Play sound on alert (mutable in settings)
- Compatible with WME Chat jumper: so each "jump" with WME Chat addon is reversible using WME Chat jumper.
↓ DOWNLOAD ↓
- In Chrome this script must be installed through TamperMonkey
- from GreasyFork.org.
| Bring up comments or questions on this page in this forum |
WME Chat Jumper 

This script lets you easily jump to another users location in WME Chat, and seamlessly return to your original location afterwards.
This content is transcluded from a nugget source ![]()
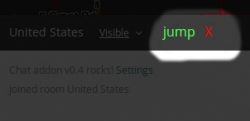
This script allows a users last location to be saved when clicking on a user name and moving to their location. By clicking on the "jump" button, you will be taken back to your previous editing location.
↓ DOWNLOAD ↓
| Bring up comments or questions on this page in this forum |
WME Chat Resizer and Auto Scroll 

Adds controls to WME chat allowing you to resize the frame, and toggle auto scrolling.
This content is transcluded from a nugget source ![]()
This adds buttons to the Waze chat window that let you click to hide or show the user list and to make the list taller or the normal height.
It also has buttons to auto / and no scrolling of the chat.
And also removes the space on the right of the chat window.
Initially this was based off Chat Jumper.
↓ DOWNLOAD ↓
| Bring up comments or questions on this page in this forum |
Device
Geocaching
This is a bookmarklet for iOS to integrate the Geocaching client with the Waze client for navigation. It has been moved to the Bookmarklets page.Toggelis Waze Editor 


This content is transcluded from a nugget source ![]()
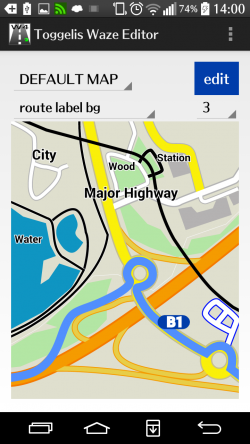
This app makes it easy to modify or create custom color schemes for your Waze client app, and update the Waze app without the necessity to open or copy schema files.
TWE 1.10.2 for Waze 4
Additional features for this version:
- Clickable preview map
- Editable road width
- Editable border sizes
- Automatically convert 3.x schemes to 4.x
- Copy / paste schemes
- Edit navigation routes (stop routes, shared routes)
- Manual language choice or system language
- Import from Gmail attachment
- Paste skin as URL or text into TWE
- Compatible Android 4.0.3 - 5.X
- Incompatible with Android 6.X due to restrictions in Waze
↓ DOWNLOAD ↓
TWE 1.2.1 for Waze 3
↓ DOWNLOAD ↓
Waze 4 schemes to play with
| ADAC | Toggelis Day Skin | Toggelis Night Skin | Electrolytes |
 |
 |
 |

|
| Greenpeace | Minimalism | Mochaccino | Rosebud |
 |
 |
 |

|
| Snowday | Tutti Frutti | Vitamin C | Green Fields |
 |
 |
 |

|
| Schema 50 | Neon Glow | Automapa | Robotka Day |
 |
 |
 |

|
| Robotka Night | |||

|
How to install the schemes directly into Waze: With your preferred internet browser on Android, copy the link of the scheme, then use the "paste skin" function in TWE to import it. Wait a second, the skin will appear in TWE and you can modify it or "save to Waze". Done.
Known problems and limitations: Cities (inner and border color) are currently not shown. This is probably a bug or a changed feature in Waze 4. The city label works, however.
Translations
If you'd like to contribute to TWE in your language, please edit the following pages without adding or moving lines, simply replace the english text by your translation. PM me if you'd like me to add your language! As soon as a language file is complete I'll integrate and publish the translation.
hebrew, indonesian, japanese, romanian
Done translations:
- Czech: Vilém Robotka
- Slovak: Hamilnes
- Russian: Mihail Serishev
- Hungarian: Akos Schneemaier
- Italian: rocket_r6
--> Translators can obtain an ad-free version of the app.
Manipulating schemas with TWE for Waze 4
Import
TWE imports to the last shown map in TWE. Waze 3 schemas are converted to Waze 4 format. An imported file is not automatically saved to Waze.
Several types of imports are possible:
- In an external app, select a schema file and "share with", "send to" or "open with" TWE.
- In an external app, show and select the text of the schema, then "share with" or "send to" TWE.
- In an external app, copy the text of a schema to the clipboard. Then in TWE, use "paste schema".
- Copy the URL (http://... or file://) of an existing schema to the clipboard. In TWE, use "paste skin".
Export
Some export examples : - In TWE, chose "share as > file", then select ES Downloader to save the file locally, or select dropbox / google drive to save the file on the cloud, or select gmail to send it by mail. - In TWE, chose "share as > text", then select your favorite text editor to receive the schema code. - In TWE, chose "copy schema", then paste the text in a text editor.
Tips and tricks
1) You just installed a minor Waze update. All your favorite schemas are gone ...
Not really. If you already had TWE installed before the update, open TWE and chose "save to waze" to reactivate the schema in Waze.
2) You imported a schema in TWE but to the wrong map? Chose "save to <right_map>", then select "cancel edit".
3) Partial import: Chose one or some lines from a scheme to just import some map properties, for instance
- Primary.Stroke:#FF0000FF
- Primary.Fill:#00FF00FF
Primary.Delta1:-3
- Primary.Stroke:#FF0000FF
then "paste skin" in TWE. Only the chosen properties will be changed on the map.
| Bring up comments or questions on this page in this forum |
Live Map
Live Map UR Overlay (LMUR) 

This script enable you to view URs, and MPs, in Livemap, with various filtering options available.
This content is transcluded from a nugget source ![]()
by Twister-UK (PM [Help]) ![]()
LMUR allows update requests and map problems to be displayed on the Live Map, with various filtering options to show/hide requests/problems by type, age, keyword, etc. Requires Live Map to be viewed via the secure (https) URL - LMUR will prompt you if a non-secure URL is used.
↓ DOWNLOAD ↓
| Bring up comments or questions on this page in this forum |
Stylish
Increased width on the Waze Wiki 

Modifies the Wiki style so that you can use the width of your browser.
This content is transcluded from a nugget source ![]()
by jlsJonas (jlsJonas PM [Help]) ![]()

Modifies the Wiki style so that you can use the width of your browser instead of the fixed 950px.
↓ DOWNLOAD ↓
Bookmarklets
Several very useful bookmarklet scripts have been developed to enhance the WME map editing process. A complete list of available scripts are on the Bookmarklets Wiki page along with instructions on how to add them to your browser.
Adding a new script
{{NewScript|SCRIPT TITLE}} template to this page in the position where you would like the new section to be. After saving the page, expand the new section and click the link to add the script details.Developing scripts
Please see Scripts/WME JavaScript development.
