|
|
| (436 intermediate revisions by 48 users not shown) |
| Line 1: |
Line 1: |
| The Waze community has created the following plugins/extensions/addons for use in the Waze web-based environments. (Client-side possible?)
| | <!-- |
| ==LiveMap==
| | #####-----#####-----#####-----#####-----#####-----#####-----#####-----#####----- |
| ===LiveMap Navigation List===
| | #### #### |
| This plugin/extension works with the Waze LiveMap only. After installing, create a route in the LiveMap by clicking on the origin and destination. Once the LiveMap requests the route, the left side area will switch from the current events scrolling list, to a navigation list of the route. Multiple routes are displayed. Each turn is clickable and the map will zoom to that location.
| | #### If you are a script author, #### |
| | #### or you are a script authors' #### |
| | #### representative you may add #### |
| | #### your scripts details to this #### |
| | #### page. Please follow these #### |
| | #### instructions so your script #### |
| | #### can match the uniform style #### |
| | #### of the rest of the page. #### |
| | #### #### |
| | #### To add a new script section #### |
| | #### to this page please add the #### |
| | #### {{NewScript|SCRIPT TITLE}} #### |
| | #### template to this page in the #### |
| | #### position where you would #### |
| | #### like the new section to be. #### |
| | #### After saving the page, #### |
| | #### expand the new section and #### |
| | #### click the link to add the #### |
| | #### script details. #### |
| | #### #### |
| | #### Your script page should not #### |
| | #### have any headers less than #### |
| | #### level 3. You should only use #### |
| | #### at least level 4+ headers. #### |
| | #####-----#####-----#####-----#####-----#####-----#####-----#####-----#####--> |
|
| |
|
| [http://userscripts.org/scripts/show/118389 Download the LiveMap Navigation List] (Firefox requires the [https://addons.mozilla.org/en-US/firefox/addon/greasemonkey/ Greasemonkey Addon].)
| |
|
| |
|
| ''Chrome users may need drag the file downloaded to their PC into the Chrome Extensions tab.''
| | The Waze community has created the following plugins/extensions/addons for use in the Waze web-based environments. |
| | See [[#Browser requirements|Browser requirements and instructions]]. |
|
| |
|
| [http://www.waze.com/forum/viewtopic.php?f=8&t=13511 Discussion and feedback for this addon] (Forum)
| | Please be aware that these scripts commonly require updates in order to properly work after new releases of the Waze products. While some may update automatically once their authors make changes, others may require manual updating on your part. |
| ==Editing==
| |
| ===WME Add-Ons===
| |
| '''CAUTION!'''
| |
| Please do not use this tool unless you are a very experienced Waze editor and fully understand the ramifications of using this tool. Even experienced editors should learn how to use it only on very smaller areas at a time. Read the forum linked below to better learn how to use it and to understand the ramifications of its use! | |
|
| |
|
| This is a plugin/extension which displays a table of all the current view's country, state, city and street names. You can select all segments of a street using a custom button. This extension makes it very easy to find and fix incorrect cities and states (in the U.S.) and bad street names. The tool has many other capabilities as well.
| | [http://code.waze.tools/ Common Scripts Repository for Developers & End Users] |
|
| |
|
| Since this tool is updated often, please see the forum linked below for a full list of features, download links, installation instructions, and discussion for the latest version.
| |
|
| |
|
| [http://www.waze.com/forum/viewtopic.php?p=334169 "(Script) WME Add-Ons"] | | {{TOC limit|3}} |
| | <br> |
| | ==Browser requirements== |
| | <div style="border:solid 2px #ffbb00; border-radius: 100px 0px 0px; background: #8AC007; padding: .5em 1em 0em; background-color:transparent; color:#000;zoom: 1"><!-- |
| | --><div style="padding:1ex 1ex 0ex; "> |
| | {{Anchor|browsers|Chrome|Chrome / Blink / Opera Next|Firefox|Firefox / Mozilla|Internet Explorer|Safari|Monkey|Greasemonkey or Tampermonkey add-on for script management}} |
| | {{Expand|/Browser requirements|General installation instructions|section=3|summary=Click Expand for details on general installation info for specific browsers, and the [http://tampermonkey.net/ Tampermonkey], and [http://addons.mozilla.org/en-US/firefox/addon/greasemonkey/ Greasemonkey] script managers. <br>''(Chrome / Blink / Opera Next / Firefox / Mozilla / Internet Explorer / Safari)''}} |
| | </div></div> |
|
| |
|
| ''There is a previous version of this tool called "WME Extended Tools". Due to changes to the Waze Map Editor, its functionality was broken, and the decision was made to re-write the tool from scratch. '''WME Extended Tools is no longer supported, should be uninstalled, and should no longer be used.'''
| | ==Map Editor presentation enhancements== |
| | {{NewScript|WME ClickSaver}} |
|
| |
|
| ===Highlights for Landmarks and Segments===
| | {{Anchor |Highlights for Landmarks and Segments|WME Color Highlights (WMECH)}}<!-- |
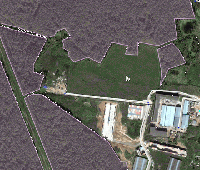
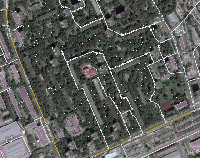
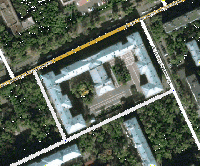
| This script adds color highlighting to segments and landmarks according to their status and type. The highlighting of segments is likely to be most useful, for it shows locked and un-named roads.
| | -->{{NewScript|WME Color Highlights}} |
|
| |
|
| > [http://userscripts.org/scripts/show/141050 WME Color Highlights] script at userscripts.org.
| | {{NewScript|WME HardHats}} |
|
| |
|
| [[Image:Wme-highlights.png]]
| | {{NewScript|WME Highlighter City}} |
|
| |
|
| ''Chrome users will need to download this to their PC, and then drag '141050.user.js' into the Extensions tab.''
| | {{Anchor|WME Junction Angle info}}<!-- |
| ''Firefox requires the [https://addons.mozilla.org/en-US/firefox/addon/greasemonkey/ Greasemonkey Addon].''
| | -->{{NewScript|WME Junction Angle Info}} |
|
| |
|
| Discussion of the script can be found in the forum: [http://www.waze.com/forum/viewtopic.php?f=10&t=25806 Script to add Highlights for Segments & Landmarks]
| | {{NewScript|WME layout tweaking user style}} |
| ===Street to River===
| |
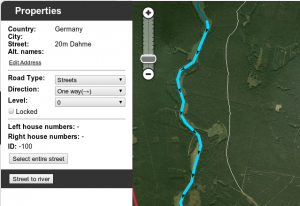
| [[image:street-created-selected-and-named.png|thumb|Street created, selected and named]]
| |
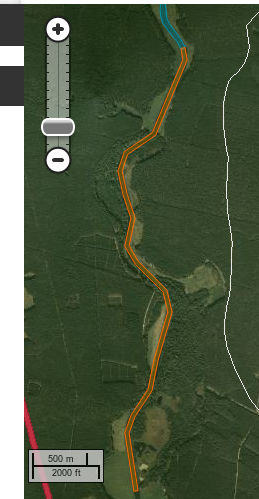
| [[image:created-river-after-helper-street-deleted.png|thumb|River created and helper street deleted]]
| |
|
| |
|
| The script is designed as a helper for creating river/railroad landmarks for the free waze navigation system. The script transforms the the geometry of a new unsaved street to a river or railroad landmark. You can predefine the width and the name for the new landmark in the form of a special street name.
| | {{NewScript|WME Level Highlighter}} |
|
| |
|
| Mini howto:
| | {{NewScript|WME LiveMap closures}} |
| * install this script as greasemonkey script or chrome extension
| |
| * draw a new street but do not save the street
| |
| * add and apply a street name to define the rivers name and width. This step is optional.
| |
| : Example: ''20m Spree'' creates a 20 meters wide river named ''Spree''
| |
| * Select the helper street
| |
| * Click the '''Street to river''' or '''Street to railroad''' button
| |
| * Delete the helper street
| |
| * Edit the new landmark as you like. You can even set the landmark to another type. [http://world.waze.com/livemap/?zoom=9&lat=52.45873&lon=6.17407&layers=BTTTTT "Here"] it is used to mark a railroad (using landmark type 'other'.
| |
|
| |
|
| | {{NewScript|WME Place Interface Enhancements}} |
|
| |
|
| | {{NewScript|ShowTown}} |
|
| |
|
| | {{NewScript|Street Vector Layer}} |
|
| |
|
| | {{NewScript|WME Street View Availability}} |
|
| |
|
| | {{NewScript|WME True Segment Length}} |
|
| |
|
| | {{NewScript|WME Tab Manager}} |
|
| |
|
| | {{anchor|UR_Overview_Plus}}<!-- |
| | -->{{NewScript|UR Overview Plus (URO+)}} |
|
| |
|
| | {{anchor|UR Comments}}<!-- |
| | -->{{NewScript|URComments}} |
|
| |
|
| | ==Map Editing== |
|
| |
|
| | {{Throttle warn}} |
|
| |
|
|
| |
|
|
| |
|
| | {{anchor|Waze Aerial Shifter}}<!-- |
| | -->{{NewScript|WME Aerial Shifter (WAS)}} |
|
| |
|
| Examples of rivers created by the script:
| | {{NewScript|WME center to begin-end of street}} |
| * Spree: https://world.waze.com/cartouche/?zoom=2&lat=52.29672&lon=14.25296&layers=BTFFFTTTTFTTTFTTTTT
| |
| * Nottekanal: https://world.waze.com/cartouche/?zoom=1&lat=52.22414&lon=13.48316&layers=BTFFFTTTTFTTTFTTTTT
| |
|
| |
|
| Download the script from: [http://userscripts.org/scripts/show/122049 userscripts.org]
| | {{anchor|WME Junction Node Fixer (JNF)}}<!-- |
| (Firefox requires the [https://addons.mozilla.org/en-US/firefox/addon/greasemonkey/ Greasemonkey Addon].)
| | -->{{NewScript|WME Junction Node Fixer}} |
|
| |
|
| Discussion for the script can be found in the forum topic: [http://www.waze.com/forum/viewtopic.php?f=10&t=14550 "Greasemonkey script for easy river drawing"]
| | {{NewScript|WME Magic Wand}} |
|
| |
|
| ===WazeBar===
| | {{NewScript|WME Place Harmonizer}} |
| WazeBar is an alternative menu bar for WME that also integrates other scripts, making them available on Safari. While this is (as of yet) mainly geared to bring extensions to Mac users, making WazeBar cross-browser is being evaluated for future implementation.
| |
| WazeBar provides the following features:
| |
| * Full-screen mode
| |
| * Alternative dark theme
| |
| * Integration of WME Color Highlights and UR Overview scripts.
| |
| More features and additional script integrations are being worked on. You can get in on the discussion here: [http://www.waze.com/forum/viewtopic.php?f=10&t=28031]. The Safari Extension can be downloaded here: [http://www.rocking-mm.com/WazeBar/].
| |
|
| |
|
| ===Roudabout Angles and Landmark===
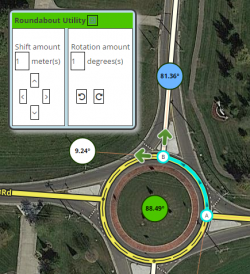
| | {{NewScript|WME RA Util}} |
| Roudabout Angles and Landmark is a script with two features:
| |
| * selecting a roundabout node, on the left side there is a button to automatically create a "junction" landmark around the landmark. Roundabout segments shall not have street name set, but the roundabout name should be added to this landmark in the middle, so the label appears horizontally.
| |
| * selecting a roundabout node, on the left side there is a button to create a temporary landmark in the form of a leaf, which will denote the approximate 90º, 180º and 270º range that Waze uses to switch from the "take the nth exit" to the "straight ahead/turn left/turn right" on roundabouts with two to four connections.
| |
|
| |
|
| If the created landmark is not round, it means the roundabout has something screwed up, usually a reversed A->B segment, so it also helps ensuring proper roundabouts.
| | {{NewScript|WME Road Selector}} |
|
| |
|
| * by davipt [[http://www.waze.com/forum/viewtopic.php?f=8&t=32633#p298017 Forum]] [[http://userscripts.org/scripts/show/152981 script]]
| | {{NewScript|WME Roundabout Angles}} |
| | |
| | {{NewScript|Street to River PLUS}} |
| | |
| | {{NewScript|WME Advanced Closures}} |
| | |
| | {{anchor|Install WME Toolbox|Update WME Toolbox|WME Toolbox features|Toolbar|Toolbox|Highlight layers menu|And more|More information}}<!-- |
| | -->{{NewScript|WME Toolbox}} |
| | |
| | ==Map validation and routing== |
| | {{NewScript|WME Route Checker}} |
| | |
| | {{NewScript|WME Route Speeds (Traffic)}} |
| | |
| | {{NewScript|WME Speedhelper}} |
| | |
| | {{NewScript|WME Validator}} |
| | |
| | |
| | ==WME Chat== |
| | |
| | {{NewScript|WME Chat addon}} |
| | |
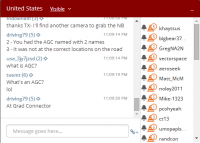
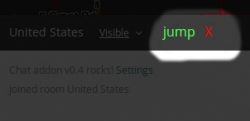
| | {{NewScript|WME Chat Jumper}} |
| | |
| | {{NewScript|WME Chat Resizer and Auto Scroll}} |
|
| |
|
| ==Device== | | ==Device== |
| | <div style="border:solid 2px #93C4D3; border-radius: 100px 0px 0px; background: #8AC007; padding: .5em 1em 0em; background-color:transparent; color:#000;zoom: 1"><!-- |
| | --><div style="padding:1ex 2ex 0ex; "> |
| ===Geocaching=== | | ===Geocaching=== |
| [[http://world.waze.com/forum/viewtopic.php?f=3&t=36866 Geocaching-Waze bookmarklet]] is a iOS Safari bookmarklet from davipt that allows driving to a given Geocaching coordinate. Currently it assumes a fixed flow within iOS and the official Geocaching client, but it can be adapted to other situations.
| | This is a bookmarklet for iOS to integrate the Geocaching client with the Waze client for navigation. It has been moved to the [[Bookmarklets#Geocaching|Bookmarklets]] page.</div></div> |
|
| |
|
| Open the iOS Geocaching app, pick up a cache, click on "Open on external map", which will open Google Maps on the browser. From this page, click on the bookmarklet, which will display the lat+lon, and then open Waze on that point, ready to drive there.
| | ==Live Map== |
| | {{NewScript|Live Map UR Overlay (LMUR)}} |
|
| |
|
| ==Developing== | | ==Bookmarklets== |
| ===JavaScript Development Best Practices for Waze Extensions and Scripts=== | | <div style="border:solid 2px #93C4D3; border-radius: 100px 0px 0px; background: #8AC007; padding: .5em 1em 0em; background-color:transparent; color:#000;zoom: 1"><!-- |
| ====Best Practices====
| | --><div style="padding:1ex 2ex 0ex; "> |
| All of the normal best practice guidelines apply, some references:
| | <br /> |
| * [http://www.javascripttoolbox.com/bestpractices/ JavaScript Toolbox]
| | Several very useful [http://en.wikipedia.org/wiki/Bookmarklet bookmarklet] scripts have been developed to enhance the WME map editing process. A complete list of available scripts are on the [[Bookmarklets]] Wiki page along with instructions on how to add them to your browser. |
| * [http://sarfraznawaz.wordpress.com/2012/02/19/842/ Sarfraz Ahmed's Blog]
| | </div></div> |
| To help with this, run your code through some useful analyzers to head off potential problems, like:
| |
| * [http://www.jshint.com JSHint]
| |
| * [http://www.jslint.com JSLint]
| |
| * [https://developers.google.com/closure/ JavaScript Closure Tools]
| |
| ====jQuery====
| |
| WME is built on jQuery. This makes it easy to manipulate, access properties, and directly reference the built-in Waze objects underlying WME. Using jQuery enables tighter integration into WME, reduces code, and builds on what is already there. As of now, WME is running jQuery 1.7 vanilla, which does not include any optional modules like jQuery UI.
| |
| ====Variable & Function Prefix====
| |
| To ensure that your code is safe from collision with other scripts and extensions, please prefix all variables and functions with a prefix of your choosing (this includes local variables and global variables, since your entire script is made public when it is loaded in WME). An example would be instead of naming a variable "version", name it "coolscript_version" instead, if your script is named "Cool Script".
| |
| ====Code Encapsulation====
| |
| While not technically code encapsulation in the object oriented sense, please encapsulate all code with a function, except requisite bootstrap code and initializer calls.
| |
| ====UserScript Bootstraping====
| |
| When creating user scripts for Greasemonkey, Chrome, or TamperMonkey, use the following bootstrap at the start of your script. timbones did extensive research on this to make sure it is completely cross-browser compatible. Not only will it work in GreaseMonkey, Chrome, and TamperMonkey, but can also be dropped into a Safari Extension without any recoding.
| |
| ----
| |
| <pre> | |
| function coolscript_bootstrap()
| |
| {
| |
| var bGreasemonkeyServiceDefined = false;
| |
|
| |
|
| try
| | ==Adding a new script== |
| {
| | <div style="border:solid 2px #93C4D3; border-radius: 100px 0px 0px; background: #8AC007; padding: .5em 1em 0em; background-color:transparent; color:#000;zoom: 1"><!-- |
| if (typeof Components.interfaces.gmIGreasemonkeyService === "object")
| | --><div style="padding:1ex 2ex 0ex; "> |
| {
| | <br /> |
| bGreasemonkeyServiceDefined = true;
| | To add a new script section to this page please add the '''{{tlx|NewScript|SCRIPT TITLE}}''' template to this page in the position where you would like the new section to be. After saving the page, expand the new section and click the link to add the script details.</div></div> |
| }
| |
| }
| |
| catch (err)
| |
| {
| |
| //Ignore.
| |
| }
| |
| if ( typeof unsafeWindow === "undefined" || ! bGreasemonkeyServiceDefined)
| |
| {
| |
| unsafeWindow = ( function ()
| |
| {
| |
| var dummyElem = document.createElement('p');
| |
| dummyElem.setAttribute ('onclick', 'return window;');
| |
| return dummyElem.onclick ();
| |
| } ) ();
| |
| }
| |
| /* begin running the code! */
| |
| coolscript_init();
| |
| }
| |
|
| |
|
| function coolscript_init()
| | ==Developing scripts== |
| {
| | <div style="border:solid 2px #93C4D3; border-radius: 100px 0px 0px; background: #8AC007; padding: .5em 1em 0em; background-color:transparent; color:#000;zoom: 1"><!-- |
| //run your code here
| | --><div style="padding:1ex 2ex 0ex; "> |
| }
| | Please see [[Scripts/WME JavaScript development]]. |
| | </div></div> |
|
| |
|
| // [...]
| | [[Category:Waze Map Editor]] |
| // then at the end of your script, call the bootstrap to get things started
| |
| coolscript_bootstrap();
| |
| </pre>
| |
| ----
| |
