| This information is obsolete and the active links to this page have been reviewed for disconnection or replacement. More current alternate information is likely available and should be followed rather than this information. |


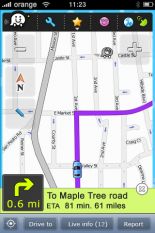
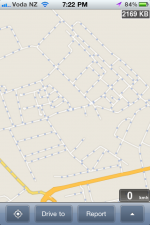
If your map looks more like the one on the right, you starting in an area with a base map. This is good news. It means Waze has acquired information about roads in your area. You do not have to manually map most of the roads. This gives you a head start on getting the map to the point where you can use it to plan a route to your destination.
Incompleteness of the Base Map
Base maps are supplied with different amount of information, so some base maps are more complete than others. And the information can be inaccurate or out of date
- Roads may have no names. Or some may be named. Some names may not follow the same conventions used for naming roads in your country
- Road types may be missing. Or incomplete. Or not match the conventions used in your country
- Roads may have no city name attached to them
- Roads may be all set to No Entrance. One-way and two-way settings may be absent or wrong
- Roads may be missing or with an incorrect layout
- Junctions may be set to allow no turns, so there is no connectivity between roads. Or connectivity may be incomplete or wrong
- Junctions may be missing, especially on dual carriageways
This isn't too bad. Even if the base map is the most incomplete it can be, a small city can be made fully mapped by one person in a few hours.
Requirements
- You need a reliable source of the names of roads in your area
- You should be familiar with the agreed conventions for naming roads and setting road types in your country
- You need to decide on a systematic way of working across the map. It can be very difficult to identify roads you have not yet worked on if they look the same as other roads. If the road directionality on your base map is all set to No Entrance, you can see the roads that you have edited. It is impossible to tell by looking whether you have edited a junction, which is why it can be useful to do step 2 at the same time you do a road.
- You need to know how to use the Waze Map Editor (WME) to edit the map
Map Editing Permission
You already have permission to edit the base map to get most of the job done
- Anyone can edit the names and set the properties of roads on a base map
- Anyone can select a junction and enable all turns on a base map
With that ability you can make a base map nearly complete, so you can set to work immediately.
More detailed changes do require extra map editing permissions, but those tasks can be done later. You can gain permission within a few days of driving along the roads with Waze on - this permission extends about to any point within a mile (1.5km) of where you have driven. But you will find it easier and faster to apply to be an Area Manager for this area.
Until then you cannot:
- Change the connectivity of roads (say putting in a no-left turn restriction)
- Add or remove junctions
- Add or delete roads
Method for completing a Base Map
If you just drive around with Waze turned on it will learn to change the road directionality to one-way or two-way, correct road layout, and know what turns are allowed at junctions. But there are some things Waze can't yet learn automatically, like the name and types of of the roads.
Name the roads and set their properties
Note that while this is Step 1, you may find it more efficient to carry out all 3 steps at the same time. The next two steps will happen automatically as Wazers drive over the roads, but that may take a very long time on seldom used roads. So read on ahead before you get started.
Depending on the completeness of your base map, some or all of the information in this step may already be entered.
- With a systematic approach, select a road on the map. You can hold the Ctrl key down to select multiple segments of the same road. Then from the Edit Panel choose Edit Road Details
- Choose the appropriate road type - if in doubt, choose Street
- The country will be filled in for you. If in the USA you may need to choose your state
- Type in your city name. As this will be repeated for every road, highlight the city name and press Ctrl-C to copy the name to the clipboard. Next time, instead of typing it you can press Ctrl-V in the city name box
- Leave the English city name blank unless there is an official city name and a common English name. For example the city name may be 北京 but the English city name would be Beijing
- Next to Street enter the name of the road
- Set the direction as two-way unless you know the road is one-way. If one-way you have a choice of directions. You may see the road labelled as A-B, so choose One-Way-> for A to B and One-way<- for B to A direction of travel. Once you save changes the road will show arrows in the direction of travel. If it is wrong, select the road again and then choose Reverse road direction
- Click on Save changes
- Well done. Now repeat for the next road. Don't worry if you make a mistake. The roads can all be edited again at any time
Set the connectivity of the roads
Those roads may physically touch on the map but Waze doesn't consider roads to be connected unless they are joined with a junction that is set to allow travel on to the next road. And if they are not connected then Waze won't plan a route along them.
Eventually Waze will learn that the roads are connected if you just drive along them with Waze turned on. But you can speed that process if you edit the map to connect the roads.
It may be that the base map already includes connectivity, so you can move on to the next step.
You cannot tell whether Waze considers two roads to be connected by simply looking, so it is very important that you have a systematic approach to choosing junctions to correct. You may prefer to do it together with step 1 - fixing all the junctions on a road at the same time you enter the details for that road.
Waze will automatically restrict and allow turns as appropriate for any intersection combination of one-way or two roads. So you should not place this a junction until the directionality of all all connecting roads is set correctly. If you later change the directionality of a road - say make a road one-way instead of two-way - you need to repeat replacing all the junctions on that road.
- With a systematic approach, identify a junction on the map
- Click on the junction to select it
- From the Edit Panel, choose Enable all turns
- Well done. Now repeat for the next junction
Adding turn restrictions
You will need #Map Editing Permission to do this.
If there is a turn restriction that is not based on one-way status - for example, no left turn is permitted at an intersection, you need to add that restriction in after you place the new junction. To do this:
- Select the road you start from
- Hold the Ctrl key down and select the road you are not allowed to turn on to
- From the Edit Panel select Create turn restriction
Creating a roundabout
You will need #Map Editing Permission to do this.
You may wish to change an intersection into a roundabout. Make sure all the roads entering the roundabout are on the map first, so the roundabout directions will be correct. Then follow the instructions on creating and editing a roundabout.
Add and delete roads and correct their geometry
Once you fixed the roads and corrected their geometry, Waze can use the map you have edited for routing. Within a week you will be able to use it. New roads can be recorded and update requests can be sent just as for any other map.
But if your base map is not very complete or accurate, you may wish to spend some time adding new roads, deleting non-existent roads and editing the layout (known as geometry) of the roads. You can read the instructions for all these map editing tasks. You will need #Map Editing Permission to do this.