m (→Handling Restricted Lanes: added link to dedicated page) |
|||
| Line 147: | Line 147: | ||
This "solution" gives routing onto these special lanes a very high [[Routing penalties|penalty]] and reduce the likelihood that Waze will create a route over them. It does not prevent Waze from snapping a driver to the segments if it determines they are on such a lane, and any recalculation of the route from these segments is correct as well. However, as noted above, the fact that these lanes are usually quite close to the normal/open freeway or highway, makes it unlikely Waze will automatically recognize their true location due to GPS inaccuracy and margin of error. | This "solution" gives routing onto these special lanes a very high [[Routing penalties|penalty]] and reduce the likelihood that Waze will create a route over them. It does not prevent Waze from snapping a driver to the segments if it determines they are on such a lane, and any recalculation of the route from these segments is correct as well. However, as noted above, the fact that these lanes are usually quite close to the normal/open freeway or highway, makes it unlikely Waze will automatically recognize their true location due to GPS inaccuracy and margin of error. | ||
{{details|Carpool, HOV, Transit lanes}} | |||
==== High Occupancy Toll (HOT) Roads/Lanes (USA) ==== | ==== High Occupancy Toll (HOT) Roads/Lanes (USA) ==== | ||
Revision as of 15:26, 26 October 2014
Template:ReturnToEditingManual
The purpose of this page is to help all map editors design maps that work best for the end-user--the driving public--while minimizing the amount of (re)work you have to do because of common mistakes or subtle limitations of the tools. For those who are an Area Manager, many helpful pages already exist on your responsibilities, including how to use Waze Map Editor, identify and solve Map problems and Update requests, set standards for labeling roads, and a general FAQ. These same sources are incredibly useful for newer editors as well and should be reviewed to become familiar with the various elements of Waze map editing before getting too deep with your edits.
If you find something missing from this page or any page of the Wiki, either be bold and edit the page to add or modify the information (if you are confident that is how it works), or you can post a comment in the Wiki improvement forum.
| Some of the guidance for Best map editing practices may have specific localized adjustments for your local area. Be sure to familiarize yourself with these differences through the Local vs global guidance page. |
Overall Goals
Usability
When it comes to the map, the first and foremost goal of editing is to provide the driver with a map that is easy to follow on a small display, and to produce sensible verbal instructions when (and only when) they are needed.
Simplicity
It is not a goal to model the physical roadway lane-by-lane. Doing so often leads to unnecessary complexity--which means a cluttered map, confusing verbal directions, and lots and lots (and lots!) of extra map maintenance.
Retention
As a result of people driving over them, road segments retain certain information (e.g., average speed) that is used in route optimization. When a segment is deleted, that information is discarded. Given a choice between deleting a tangle of segments and creating new ones in their place, vs. untangling them and reusing them, it is often better to "recycle".
In Practice
When to Split a Two-Way Road (and when not to)
Generally only freeways or major highways are split into two one-way roads.
When initially reviewing whether to split or "un-split" (merge back together) a roadway, consider these points first:
- If a road is currently working with no problem reports, consider leaving it as is.
- If the area has an Area Manager, consult with them before splitting/un-splitting. If the area does not have an Area Manager and after reviewing the formal guidelines below you are unsure which way to go, consider sending a permalink of the road to the map editing forums to get additional feedback from other editors.
- Try to avoid switching roads back and forth between being split and "un-split". For example, if most of the road is clearly split and only parts would be considered a single two-way road, consider leaving it all split. The same goes for the opposite situation.
Some formal guidelines -
A road should be split when:
- It is an Interstate Highway (USA) or other Limited Access Highway using the "Freeway" road type,
- GPS tracks show a clearly definable and continuous gap (blank area) between the color-by-azimuth arrows at the 100m/500ft zoom level, or
- U-turns are required to properly make turns from public drivable road types that are blocked by a median.
A road should not be split when:
- There is a curb or non-drivable median less than 5m wide between lanes of travel (see exceptions above).
- The non-drivable median is interrupted by a cross segment at most intersections.
- There is a center turn lane (any width) between directions of travel. Splitting this type of road created problems when people turn from the middle lane because there is no road for the navigation to follow.
- The objective is solely for visual appearance or to make the road match another visual source like Google Maps.
Remember that splitting and unsplitting roads each comes with its own set of problems. Each situation is unique and some issues may be more manageable with a single two-way road, and some may work fine with a split road. Consider every aspect of routing, and carefully examine each junction before splitting or unsplitting. Regardless of whether you're splitting or unsplitting, remember that you might cause more problems than you solve and you might have to put it back the way it was before.
How to "Un-Split" two One-Way Roads
Unfortunately there is no easy way to merge two one-way roads back into a two-way road--which is why you should always give a lot of thought before splitting a road in the first place. And then think some more.
When you come across a road in your area that has been split, but shouldn't have been, you have some major map surgery ahead of you. Because of this high complexity in this process, it is recommended NOT to merge the two one-way split roads UNLESS there are Update Requests related to the road caused by it being split.
The process to undivide a road (convert from two one-way roads to one two-way road) written below has been specifically designed to preserve the underlying address information embedded in the street segments. It is very important that you do not simply delete one of the two roads because that deletes the house address data on that part of the road. They would have to be looked up and manually added back to the new road.
The steps below show how to properly merge two one-way roads and preserve the underlying house numbers.
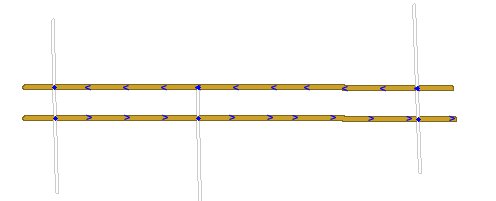
This is our example road segment. For the entire length of the road you need to:
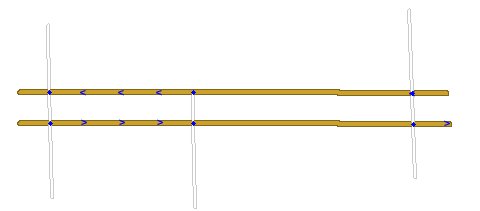
1. Select the two segments to be merged and set them both to two-way.
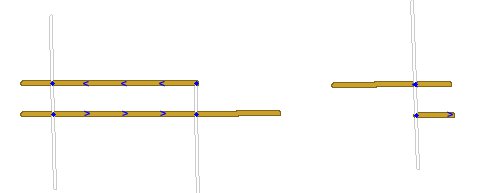
2. Disconnect both segments from one side of the section being undivided. It is best to disconnect alternate ends of each segment as shown.
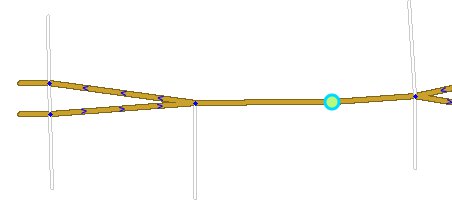
3. Bring the two disconnected ends together in the middle (and realign the roads as necessary). You can remove the junction point you just created by selecting it and using the Delete key.
The following video was recorded by an editor merging two split one-way roads so the addresses were preserved. This video follows the described steps above, but may help seeing it happening in real time. Press the "enlarge button in the lower right corner to see it full screen.
{{#ev:youtube|6blRMtGwaYA}}
After BOTH sides are merged into one, you need to re-align house number to the street so that it lines up with driveway/entrance of the building the bubble is over.
- With the street/road selected, click ‘Edit house numbers’.
- From the house number editing view, you need to select each house number one-by-one.
- With the house number selected, you see the dashed line is attached to a circle on the street.
- Select the circle and move it along the road closest to the entrance of the driveway to the building.
Also be sure to check the following:
- Remove all "orphaned" junctions.
- Change the direction of the preserved segments to two-way.
- Check/fix the connectivity of all the roads already connect to the side you kept.
- Connect (and set connectivity) of all the roads that used to be connected to the other side.
- Make sure all the new two-way segments are connected.
- Adjust the geometry to move the two-way road segments to the middle of the road.
Now repeat the entire process for the remaining segments matching the two opposite from each other.
It isn't difficult once you have gone through the process a couple of times.
Caveat: If you decide to be clever and edit the road properties of multiple segments at a time, first familiarize yourself with the known problems with mass-editing. It can be done -- but if you're not careful, you'll find that all the road segments have reverted to Streets...in Alabama...and any alternate road names are lost.
Highways and Ramps
Useful long-range navigation is impossible with Waze if the highways are broken. Because limited-access roads -- typically Freeways & Major Highways -- offer more to think about (and more opportunities to mess them up) than typical surface-road work, this section is very important.
Roads
The term "limited-access road" here refers to a road that is multi-laned in each direction, with a physical barrier between directions, and which can be entered and exited solely by ramps. Such roads almost always should be mapped as separate one-way segments -- and other roads almost never should be.
Ramps
As stated elsewhere, off-ramps should be named according to their exit number if they have one, as well as whatever is on the actual exit sign; e.g., "Exit 7: Rte 3 S / Braintree / Cape Cod". On-ramps should be named "to" whatever they lead to; e.g., "to I-93 S / Quincy / Providence RI". Because ramps often run especially close to other ramps that flow in the opposite direction, a ramp should be locked to preserve directionality.
Remember to check connectivity and turn restrictions while you're there.
- There is a more detailed description of How to label Exit ramps and Entrance ramps.
- Be sure to understand the difference between ramps and at-grade connectors.
Overpasses & Underpasses
Setting the road elevation can be tricky. Sometimes it is more important to know that road elevation is an issue for a particular segment (e.g., a mile-long stretch of highway that extends well beyond the screen boundaries), than what its actual value is, or of maintaining a consistent elevation across multiple segments of the same road.
Ground level should be considered as a "sentinel value" that signifies a segment has no overpasses or underpasses. When editing an over/underpass, if either segment is at ground level, set the other one to a non-zero value that reflects its relative elevation to the one marked at ground level. If both elevations are already non-zero, either they are already correct (in which case no further action is required) or they are incorrect in which case the area needs to be studied carefully so as not to "break" other intersections that have already been evaluated and assigned.
In many cases, the conflict can be resolved simply by adjusting the elevation of one segment, or perhaps of several segments. Proceed with caution. In really complicated situations, it might help to draw a picture, or to start by looking for the top-most or bottom-most segment.
Occasionally you run into a situation in which no set of values will work. For example, three segments named A, B, and C: A crosses over B, B crosses over C, and C crosses over A. So A > B > C > A... now what? Either pretend that one of the segments crosses over both of the others, or add a junction to one of the segments so that it can have two different elevations as needed and hope nobody deletes that "unnecessary" junction without investigating why it might be there. In this example it might even make sense to add junctions to all three segments, just to make it clearer to the next AM what you're trying to accomplish.
Caveat re. Elevation
No matter what elevation road segments are assigned, if you pin a junction through them, they now form a navigable intersection, and Waze will instruct people to turn off of bridges and onto the cross-streets below. If you are looking at an over/underpass, and there is a junction where the roads cross, get rid of it. First, make sure the elevations of the road segments are correct, and that all the other information of each pair of road segments match. At that point, deleting the junction will most likely work. If that does not work, refer to deleting a junction for more information.
See also Road Elevation.
Bridging Roads
Select the two segments that cross over/under the intersection, then click on the "Bridge" link. If all goes well, the selected segments will be separated from the underlying junction, consolidated into a single segment, and their elevation increased by 1. Failing that, you may have to disconnect both sides of the over/underpassing road from the junction, make sure their elevations are correct, and then re-connect them.
Note that Railroad crossings (and other non-navigable types) at grade with a street should not form a junction. See Railroads under Road Types for more information.
Handling Restricted Lanes
At this time, Waze does not have a facility to handle restricted lanes; e.g., high-occupancy/"car pool" lanes, lanes that are open (or change direction) at certain times of day, etc.. This is important because these lanes sometimes have their own ramps that the regular lanes do not have, and they often run alongside the main road, so that GPS has a hard time discriminating between the two. The result is driving instructions that can range from incorrect to deadly.
The most direct solution might appear to be omitting/deleting these lanes from the map. Please do not delete these lanes. As Waze implements more features, it helps (in terms of testing and making the feature available) if these lanes are already mapped.
The best partial solution the community has come up with so far is to leave these segments' directionality as whatever their native would be. If it's a set of lanes which switch directionality at times, set it to 2-way. If it is always a 1-way, set it as such. In order to make it less likely that Waze will route anyone onto these express lanes, HOV lanes, etc., any ramps connecting these segments to regular freeway or street segments should be set as Parking Lot road type and turns onto the parking lot road segments and the freeway or highway segments are Disallowed.
This "solution" gives routing onto these special lanes a very high penalty and reduce the likelihood that Waze will create a route over them. It does not prevent Waze from snapping a driver to the segments if it determines they are on such a lane, and any recalculation of the route from these segments is correct as well. However, as noted above, the fact that these lanes are usually quite close to the normal/open freeway or highway, makes it unlikely Waze will automatically recognize their true location due to GPS inaccuracy and margin of error.
- For more details on this topic, see Carpool, HOV, Transit lanes.
High Occupancy Toll (HOT) Roads/Lanes (USA)
The United States DOT has been working with local governments to introduce a new type of roadway called High Occupancy Toll (HOT) lanes/roads. In many cases these roads replace existing HOV lanes and run in the median between different directions of non-toll traffic along a freeway.
HOT roadways have the following features:
- These lanes/roads allow both toll traffic and HOV traffic to traverse the same lanes.
- There are no toll plazas or booths for paying by cash. All tolls are paid electronically to maintain traffic speed.
- Entrances and exits to the HOT lanes are limited to help maintain high speeds.
- There are no entrance/exit combinations where the toll fare rules don't apply.
- Tolls are discounted or waived for users that meet High Occupancy Vehicle (HOV) requirements. These requirements may change based on time of day.
HOT lanes are often marketed as "Express Lanes"; however, the term "Express Lanes" is also used by various regional governments for non-HOT lanes. In order to be considered a HOT lane for Waze purposes, a road needs to meet all criteria listed above.
The entrances to HOT lanes should be marked with the toll flag. This prevents Waze from routing those wishing to avoid tolls onto the HOT lanes, while allowing Waze to use the HOT lanes for routing for those willing to pay a toll for a faster commute.
The lanes of the HOT itself should not be flagged as a toll road, to prevent Waze from trying to route HOV users out of the HOT lanes if they have toll avoidance active in the client.
Because Waze does not currently support HOV lanes, HOV users with toll avoidance turned on are not routed onto the HOT lanes. Just as with the current HOV best practices, those that meet the HOV requirements and wish to use the HOT lanes need to navigate themselves to the HOT lanes; they are not be routed onto them by the Waze client. As with standard HOV lanes, HOV users need to recalculate the route for Waze to snap them to the HOT lane.
Because HOT lanes are still considered "experimental" there may be some variation in local implementation. If the HOT lane does not meet all the requirements listed above, check with an experienced local editor or Country Manager before making any changes. When in doubt seek advice on the forum; a change to the guidelines or an exception may need to be made for the local variation.
Toll roads
- For other uses see Toll (disambiguation).
Roads with tolls can be indicated by checking the Toll road box on the road segment properties tab. Mark a segment as a toll road only if:
- there is a toll booth, transponder reader, or other tolling device within, or at either end of the segment
Do not check the toll box setting for segments that lead up to the final toll segment even if they have no other exit except the final toll segment.
In the case of a bridge that is tolled in only one direction, split the road where the toll is collected and mark only the segment with the toll booth as a toll road.
Time Restricted Turns
Template:Time restricted turns
When to Use Ramps in an Intersection
Please see the discussion on at-grade connectors.
When to Create a Roundabout
In the author's editing and driving experience, once you learn how to create a roundabout, it is always the right time to replace an ad hoc traffic circle (built from regular road segments) with a proper roundabout. The voice cues produced by an ad-hoc circle can be terribly misleading, and the client display almost always looks unprofessionally sloppy. Replacing this with a roundabout is an instant, orders-of-magnitude improvement on both counts.
Note: A roundabout should never be used in place of an end-node on dead-end or cul-de-sac street. See: Junction Style Guide
Locking Segments
It is not recommended to lock segments in residential neighborhoods. Locking should be used on high-value roads and complicated junctions to prevent inexperienced lower rank editors from making changes.
NEVER lock a segment unless you are sure that it and everything that touches it (junctions, turn restrictions, and other segments) is 100% complete and correct.
If you run into a segment or junction that is locked by someone at a higher editing rank than you, refer to the page on unlocking an object above your rank for more information.
Locking should be used sparingly and carefully.
Junction Style Guide
When creating or editing a junction, it is very important to understand the nuances of how the Waze routing engine looks at the map segments and junctions. The Junction Style Guide provides the best practices with the many different types of junctions.
New Roads
Parking Lots
Mapping a parking lot road serves two purposes:
- it allows Waze to provide door-to-door directions within the lot;
- it allows the Waze client to get off the main road, avoiding erroneous traffic reports.
NOTE: There are few parking lots that deserve to be designated as a landmark "place". Landmark-worthy parking must be something of a destination in itself, either having a well-known and documented name, or serving multiple unrelated POIs. For information pertaining to using the Parking Lot Place please see: Places/Parking lot.
Shopping Centers
When mapping a large parking lot (e.g., at a shopping center) consider mapping only the following:
- Main entrances from the roads outside the parking lot
- Lanes that run along storefronts
- Lanes that run along main roads outside the parking area (to prevent cars in the parking area from snapping to the main roads and sending incorrect speed information)
- Primary lanes that serve to get people from one area of the lot to another
Remember, the goals here are usability and simplicity. When in doubt, imagine yourself in a car in the lot at various points, and ask yourself what the most efficient way would be to get to a store at the other end of the lot, or to exit the lot and get back on a main road, with as few convolutions as possible. The lanes that are used the most in this thought experiment should be mapped, with the rest being omitted. You can turn on the GPS points layer (Shortcut key Shift-G) to see where traffic has been most recently to help determine what might be the best section to map.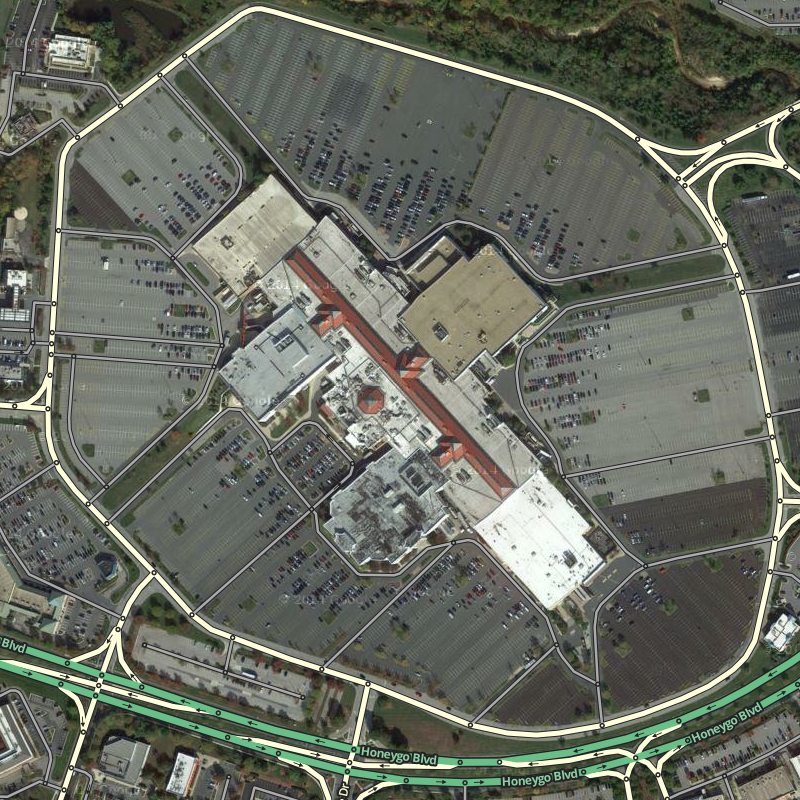
In particular, do not map every single lane, and especially not every single parking space (it has been done!). This serves no purpose but to clutter the map, confuse directions, and put an unnecessary burden on both the client and server hardware. Remember usability and simplicity are #1. Your editing time and expertise can be better used elsewhere in the map.
Small Parking Lots
Parking lots that serve a small number of businesses should be minimal: enough to give the driver correct directions into and out of the lot, and navigate to a particular business. Very small lots with a single entrance/exit could even be represented by a single segment running diagonally across the parking area.
Beware of Parking Lot exits that have a restricted turn (typically no left turn allowed across a median). Due to the way that Waze routing works in regards to penalties, if there is only one way out of a Parking Lot Waze may route you to take that restricted left turn. In these cases it would be better to provide another path out of the lot via an unrestricted turn.
Drive-Through Lots
Because these lots can be narrow and congested, with one-way sections, the simplest way to represent them may be as just a one-way drive-through loop. Caveat: because both ends of a segment cannot connect to the same junction, if the lot has only one entrance/exit, it is necessary to build the loop using two segments.
Use of the Parking Lot Road Type
The Parking Lot Road type exists to allow the mapping of parking lots, while discouraging the routing server from using them for navigation vs. the road network. As of June 2012, Waze applies a transition penalty when transitioning from a Parking Lot Road to another road type. This penalty decreases the chance that Waze will route through a parking lot as a shortcut but allows better navigation in and out of a parking lot. Every segment that is used to map a parking lot should be of the Parking Lot segment type. It is advised not to mix road types within a parking lot.
Recorded via Client
Once you start editing a road, it changes from red (a new road) to the colour of a road type (by default a white street) and will then appear on the next update of the Live Map which goes out to all Waze users.
So it is less than helpful if you do an incomplete job. At least if the road is red, then someone else knows that it needs work. If it is white, perhaps even with a street name, then it may look correct. But Waze may not view it as navigable.
Follow these simple steps, as best you can, and get it right the first time. Map Editing explains how to carry out these steps.
- Align the geometry of the road to the aerial image unless that is not appropriate in your area
- Enter the correct name and road type for your road, following the standards for your country
- Make sure the road has the correct directionality. Most roads should be Two Way.
- Add junctions where the road intersects with other roads. By default tick "Enable all turns". Restrict any turns that are not allowed. If a junction appears, just add a junction over the top. Chances are it does not have all turns enabled. Waze automatically handles turn restrictions for one way roads.
Roundabouts
- A proper roundabout (i.e., produces "at the roundabout..." verbal cues) can only be created in WME.
- When it is first created, the segments are configured as new roads - they need to be edited as above before they become part of the live map.
- Please see Creating and Editing a roundabout for more information on creating these special intersections.
Classification of crossings
Different types of crossings have standard ways to handle them.
