

Features
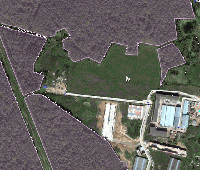
- Magic wand tool - the very same thing as in Photoshop: point on a pixel on the map, click and the tool will create a landmark covering whole area of the same color (see example GIF here)
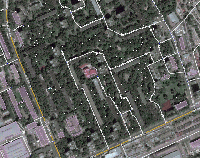
- Clone landmark (see GIF example here). With this simple tool plus rotate and resize feature (below) you can create dozens of houses in a minute! Press Ctrl (Cmd) + C to Clone.
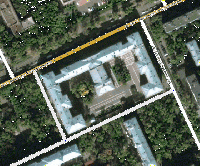
- Orthogonalize landmark corners - same tool as many of you have seen before in OpenStreetMaps iD editor, will make "almost" straight corners of the selected landmark perfectly straight thus making a beautiful landmarks in mobile clients :) See example here. Press Ctrl (Cmd) + X to Orthogonalize selected landmark.
- Rotate and resize landmarks option (GIF example)
WME MagicWand has been tested in Chrome and Firefox.
Usage
Advanced editing tools
Clone landmark
Select a landmark you want to clone and press "Clone landmark" button on the left hand menu or use Ctrl (Cmd) + C shortcut. The landmark will be cloned with a same venue type but otherwise empty.
Orthogonalize landmark
Select a landmark and press "Orthogonalize" button on the left hand menu or use Ctrl (Cmd) + X shortcut. This algorithm will try to make "about" straight corners really strait to avoid ugly look in Waze client.
Options for Rotation and Resize
- Open the MagicWand tab in the left menu;
- Check or uncheck boxes to enable or disable Rotate and Resize functionality;
- Select landmark;
- ROTATE: drag the additional landmark's vertice to rotate it;
- RESIZE: drag the additional landmark's vertice to resize. Please note that when RESIZE option is enabled you cannot modify individual vertices.
Magic Wand tool
- Open the MagicWand tab in the left menu;
- Choose the type of the supposed landmark (can be changed later);
- Toggle MAGIC WAND button: red means ACTIVE state;
- Click somewhere in the area you'd like to be converted to landmark based on the color (best work with farmland, water, building and forests);
- Wait a bit (the actual time depend on your computer) for landmark to be created;
- Edit the created landmark to fine tune the area.
What does all that options mean?
Color match algorithm - WME MagicWand can use two different algorithms to detect similar pixels on the tiles: based on color "distance" and based on "human-eye similarity". Choose the best suitable option for you but please keep in mind that when changing algorithm you will need to play with Tolerance option too as both algorithms uses it differently.
Tolerance option basically changes sensitivity of the algorithm, what pixels would be supposed to have "similar" color. Large values will select all pixels -- that is not what you want :)
Landmark simplification - as map tiles contains tons of pixels of different color finding appropriate polygon to contain all of "similar" pixels is a difficult computational problem. Current implementation uses one of convex hull algorithms to do it. The problem is that it creates many points on the curves and corners and thus you can use simplification parameter to remove unnecessary points automatically.
Notes
- Please wait when map tiles will be fully loaded after moving or zooming to make plugin work properly.
- As WME MagicWand uses convex hull to approximate the area it is not able to correctly select difficult concave landmarks. I was not able to implement concave hull algorithm yet and I will really appreciate any help anyone can give me :)
- As far as I understand we can make the script more accurate if it will compare not individual pixels but certain groups, say 5x5 or 10x10. Need an advice about it though.
I'm really open for any suggestions and comments :)
Installation
- Download script using Install button in the right top corner;
- Open Options -> Tools -> Extensions page;
- Drag & Drop downloaded file to Extensions page.
↓ DOWNLOAD ↓
| Bring up comments or questions on this page in this forum |