Overview
When using Waze in navigation mode, it controls routing of traffic using a penalty system. What this means is less desirable roads or turns for through-traffic would have a higher penalty when calculating the route from point A to B. The higher the combined penalty, the less likely the Waze system will want to route through those segments and turns. Therefore it takes the least penalized route combined with relative traffic and distance information.
A junction is created when one segment is connected to another segment. At this junction there are controls for how Waze will navigate through this junction between the segments. These controls appear in the Waze Map Editor (WME) as red and green arrows depending upon whether a particular direction of travel is allowed through that junction. These settings are called turn restrictions.
Before continuing to review the information below, but sure you are familiar with the basic information on setting turn restrictions. Then return here for this more detailed information on how different turn restrictions operate.
Key terms
Restricted Turn - ![]() - Indicated with a red arrow and creates a high penalty for routing from one segment to another through that junction.
- Indicated with a red arrow and creates a high penalty for routing from one segment to another through that junction.
Enabled Turn - ![]() - Indicated with a green arrow and creates a low penalty for routing from one segment to another through that junction.
- Indicated with a green arrow and creates a low penalty for routing from one segment to another through that junction.
Soft Turn - Not currently visibly distinguished from Hard Turns in the editor, but is generated automatically by the Waze routing engine for turns from segments newly added to current or new junctions, but the already present segments in the junction will have hard restricted turns going to the newly added segment. Also, original base map imported junctions not set manually by an editor will be soft restricted.
Hard Turn - Not currently visibly distinguished from Soft Turns in the editor, but is generated when a user manually sets a turn as restricted or enabled.
These conditions are combined to form four different states shown in the table below.
| Turn State | Restriction Penalty | How to Set | More Information |
|---|---|---|---|
| Hard Restricted | Very High | When an editor clicks on an arrow to change it from green to red or from red to green to red again | Waze will generally not route through this turn |
| Soft Restricted | High | State of all newly created turns | Cannot return to this state unless an editor disassembles an intersection and rebuilds it again |
| Soft Enabled | Low | Automatically set by Waze when traffic flows through Soft restricted turns enough times | Waze will not override a Hard restricted turn due to traffic flow against that direction |
| Hard Enabled | Very Low | When an editor clicks on an arrow to change it from red to green or from green to red to green again | Also set when selecting a junction and pressing the Q then W shortcut keys |
Related shortcuts

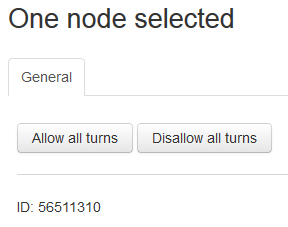
On the left side of the screen you will see action links for the selected node (or junction). Depending on the current state of the junction, one or both of the buttons Allow all turns or Disallow all turns will appear. For example, if all turns are currently allowed, then only the Disallow all turns link will appear.
Alternately you can use the keyboard shortcut W to Allow all turns and the shortcut Q to Disallow all turns.
Other helpful turn arrow keyboard shortcuts are:
- Shift+z - Toggles between: 1) showing the enabled and restricted turn arrows for the selected segment, and 2) showing all restricted turns (red arrows only) for every junction on the visible map (up to zoom level 4 or 500 ft in the lower left map legend).
- a - Toggles between making the turn restriction arrows directly selectable (opaque) or transparent. Transparency enables selecting objects below the arrow on the map.
- s - Toggles between separating turn arrows so they don't overlap or leaving them overlapping. This can also be used to refresh the screen when you have toggled visibility for all restricted turns, and you are modifying turn restrictions.
To see all keyboard shortcuts, press the ? on the keyboard.
Best practices
After creating a new junction, first be sure to set the one-way and two-way traffic direction on all connected segments. Then it is best to initially Disable and Enable all turns through that junction by selecting it and pressing Q followed by W. Then manually set any necessary individual restricted turns by selecting each segment one at a time and set the needed arrow to red.
Note that once a segment is disconnected from a junction, returning that segment to the same (or a different segment) will reset the turns from that segment to soft turns again. Use the above steps to return it to hard turns.
Time restricted turns
Route calculation
For those interested, there is an article covering How Waze calculates routes for more information on this topic.