KKeine Bearbeitungszusammenfassung |
K (Sprachliche Korrektur bei Meldung erstellen) |
||
| Zeile 7: | Zeile 7: | ||
'''Um eine Meldung zu erstellen, muss GPS-Empfang und eine Internetverbindung bestehen.''' | '''Um eine Meldung zu erstellen, muss GPS-Empfang und eine Internetverbindung bestehen.''' | ||
#Tippe auf den orangefarbenen Button, der sich unten rechts befindet. Standort und Zeit der Meldung sind jetzt gespeichert.[[Datei: | #Tippe auf den orangefarbenen Button, der sich unten rechts befindet. Standort und Zeit der Meldung sind jetzt gespeichert.[[Datei:Screenshot android focus report bubble.png|rahmenlos|400x400px]] | ||
#Wähle die entsprechende Meldung aus. | # | ||
#Falls die Meldung nicht unmittelbar näher definiert werden kann, steht die Option ''Später'' zur Verfügung. Diese kann entweder angetippt werden oder erfolgt automatisch, nach ca. 10 s ohne weitere Eingaben. Die so | #Wähle die entsprechende Meldung aus. | ||
# | |||
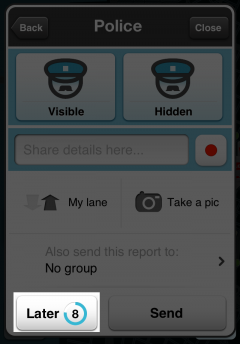
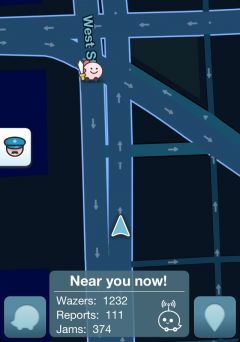
#Falls die Meldung nicht unmittelbar näher definiert werden kann, steht die Option ''Später'' zur Verfügung. Diese kann entweder angetippt werden oder erfolgt automatisch, nach ca. 10 s ohne weitere Eingaben. Die so zwischengespeicherte Meldung wird dann oben links angezeigt. | |||
#Wähle die entsprechende Option, um die Meldung genauer zu beschreiben. | #Wähle die entsprechende Option, um die Meldung genauer zu beschreiben. | ||
#Tippe auf ''Senden'', um die Meldung abzuschließen. | #Tippe auf ''Senden'', um die Meldung abzuschließen. | ||
[[Image:IOS_Simulator_Screen_shot_Feb_26%2C_2013_3.48.46_PM.png|240px]] | |||
[[Image:3alertHowLater.png|240px]] | |||
[[Image:Report35P.jpeg|240px]] | |||
---- | |||
==Report types== | ==Report types== | ||
| Zeile 180: | Zeile 190: | ||
<center>[[Waze_Version_3.5|Back to Waze Version 3.5]]</center> | <center>[[Waze_Version_3.5|Back to Waze Version 3.5]]</center> | ||
Version vom 17. August 2022, 15:54 Uhr
Meldungen erlauben dem Nutzer, andere Wazer über besondere Ereignisse oder Vorkommnisse entlang der Straße zu informieren. Des Weiteren können Kartenfehler gemeldet werden.
Meldung erstellen
Um eine Meldung zu erstellen, muss GPS-Empfang und eine Internetverbindung bestehen.
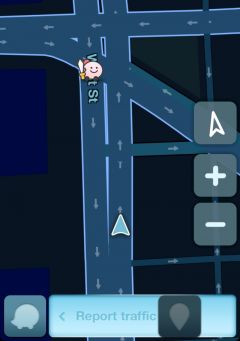
- Tippe auf den orangefarbenen Button, der sich unten rechts befindet. Standort und Zeit der Meldung sind jetzt gespeichert.

- Wähle die entsprechende Meldung aus.
- Falls die Meldung nicht unmittelbar näher definiert werden kann, steht die Option Später zur Verfügung. Diese kann entweder angetippt werden oder erfolgt automatisch, nach ca. 10 s ohne weitere Eingaben. Die so zwischengespeicherte Meldung wird dann oben links angezeigt.
- Wähle die entsprechende Option, um die Meldung genauer zu beschreiben.
- Tippe auf Senden, um die Meldung abzuschließen.
Report types
Traffic Jam
Hold the report button ![]() and slide left:
and slide left:
Here you can choose between:
 - Standstill traffic - only select this option if you are in a bumper-to-bumper situation and movement is approximately one car length every 10 minutes and above, and you are not at a traffic light junction (signalized intersection).

 - The "My lane" and "Other lane" option does not currently function, but will in a future update.
 - Take a photo of the event
Police
Here you can choose between:
Accident
Here you can choose between:
Hazard
Here you can choose between:
Camera
To report a camera not already on the map, from the Report menu press Camera at the point where you are very near the location of the camera itself.
Choose between speed trap camera, red light camera or fake camera, choose which side you spotted the camera (on your lane or other lane):
Once you report the camera, someone needs to go inside Waze Map Editor (WME) to "approve" the camera.
Note that not all that appear to be cameras are the types of cameras you report in Waze. Please be sure to review the article on cameras for more information on the correct cameras to report.
Map chat
| The information on this topic is coming soon. |
Map issue
| The information on this topic is coming soon. |
Gas prices
For reporting gas, diesel, and petrol prices, please read the manual Here
Closure
After selecting the Closure icon, you will be asked to choose which road (entrance) you want to block (you can choose more than one), just click on the arrow:
Click on Continue:
Now choose the closure type - Hazard, Construction or Event
You can also choose the duration of the closure, record a voice and take a photo.
Click on Send to publish it to the map.
Notes:
- If one user reports a road closure - it will only affect that user's view of the map. In order to affect all users, a number of users need to report the same closure.
- The number of reports needed to close the roads for all the users varies based on the road's weight, the user's rank and the country.
- The road will be opened when a number of users drive through the road.
Points and limits
Points are given for each report you make while using Waze. When you report too many times in a short span of time or distance, Waze may initially show only getting 3 points for your last report. It is also possible if there are too many too quickly, you will not be permitted to post your last report. If that happens you simply wait for a period of 5 minutes or so and try again.
Impact to routing
These reports do not affect routing, although when a traffic report is sent, the routing server will take a closer look at the GPS speed information coming from current Wazers in that area to possibly reset the current speed of that segment of road. At that time the routing server will consider the current average speed when routing new direction requests. Otherwise a road full of "reports" on its own will not affect the route selected by the server.


