| Redak 482: | Redak 482: | ||
==== "Photos" tab ==== | ==== "Photos" tab ==== | ||
This tab shows all the photos that users have associated with the location. Currently, in the WME photos can only be checked and deleted, adding is only possible through the app. | |||
[[File:Slike2.PNG|border|center|Places / Photos]] | |||
===== Determing acceptable photos ===== | |||
It is difficult to say in general which photos are acceptable. It also depends on the type of location. Generally speaking, only photos that assist the driver and clarify what and where his destination is should be accepted. The system also tries to show the user the most appropriate photo (Direction of access, time of day, etc.) | |||
The following guidelines should be used by editors and users when taking / validating photos: | |||
{| class="wikitable unsortable" | |||
|- | |||
! Photos should... | |||
! Photos can... | |||
! Photos shouldn't... | |||
|- | |||
| show the external appearance of the location | |||
| show store entrances | |||
| show people (especially with recognizable faces). | |||
|- | |||
| have good quality and visibility (not blurred, not through rain or dirty car windows, not from moving cars / trains / etc.) | |||
| show front of house / main entrance with company names | |||
| show legible license plates | |||
|- | |||
| have proper lighting | |||
| show front and side views that clearly mark the right building | |||
| show anything else that allows you to associate a specific person with a photo / place | |||
|- | |||
| be able to differentiate the located location from the adjacent buildings | |||
| show street view with posters | |||
| show private buildings from the courtyard entrance | |||
|- | |||
| show pictures in daylight | |||
| show images in the evening or night, as long as the image shows something and can be used to identify the location | |||
| | |||
|- | |||
|} | |||
Examples of suitable photos: | |||
<gallery> | |||
Image:StrossmayerovaGalerija.PNG | |||
Image:TZVGredelj.PNG | |||
</gallery> | |||
Examples of '''inappropriate''' photos: | |||
<gallery> | |||
Image:Kaufland.PNG | |||
Image:HotelTrakoscan.PNG | |||
</gallery> | |||
=== Place Updates === | === Place Updates === | ||
Inačica od 5. studenoga 2019. u 15:27
Hopefully you're reading this and want to edit the map, either because you've found a mistake or you want to add a new road. Either way, it is important that you adhere to the standards already set. The idea of this page is to get you started quickly for those people who may not have the time to read the whole of the wiki yet.
However, it is imperative that you do take the time to read further should you decide to edit more.
Precautions
Most editors start here because they have found something wrong with the map.
If you are working in an area which has not been edited, then the segments don't record any updates since they were created and won't have any road or city name or the direction set. If so, then skip to the next section and get straight to work! The guidance you will find here and elsewhere in the wiki should be sufficient for you to make a useful contribution immediately.
If you are working in an area which has been edited recently, then remember that this has been done by other editors who may have invested hours of their time trying to make the roads and cities as accurate as possible. You are not the first person to have been there, so please be careful before changing others' work. Read the text in Update Requests (URs) carefully - it may tell you that someone is already working on the roads in that area.
You should send a Private Message (PM) to the editors whose work you are about to change, as they might be working on a longer-term project to improve a particular area, and your changes might help or hinder this. When editors have invested a lot of time in improving an area, they can be a bit possessive about it, and want to be assured that new editors are going to make changes that improve it further.
If you have any questions about editing, then read the wiki and ask questions in the forums. Croatia has its own discussion forum which you should visit regularly. Join in discussions to get clarification for things you don't quite understand. Send PMs to other editors who seem to work in your area. Get to know the Area Managers who have shown good editing skills and have been allocated a specific area to look after.
Above all, use the search feature in both the forums and this wiki to find what's already been asked and answered. And have fun!
Roads
All roads are made up of 1 or more segments.
Segments are connected by 1 or 2 nodes (junctions).
When you select a segment you can see which turns are allowed at its nodes. Green indicates you can turn that way, red, you can't. Simply click on the arrow to turn it from green to red or vice versa. (If you select more than one segment at a time, the turns will not be displayed.)
You can also see its City name & Road name, Type, Direction, Level and Lock level. You cannot edit roads locked by a higher level editor than you. To get it unlocked you should post on the Forum.
Naming
Freeways/Motorways
Classified freeways/motorways in Croatia are known by a single letter and number combination which should be included in the segment name so that Waze instructions include identifying information.
When naming Freeways/Motorways, the city field should be set as 'none', this prevents City name smudge across the map.
- The street field gets the primary name of the freeway/motorway, i.e. the number of the freeway/motorway:
e.g. A2
- If the freeway/motorway is part of the European E-road network, then you should put this name into the alternative name field:
e.g. E57
Ramps
- Exits are named like this:
Format:
Izlaz city (max. two cities)
Example:
Izlaz Samobor / Sveta Nedelja
- Entrances are named like this:
Format:
road number > city (max. two cities)
Example:
A3 > Zagreb / Slavonski Brod
State/county/local roads (D, Ž, L)
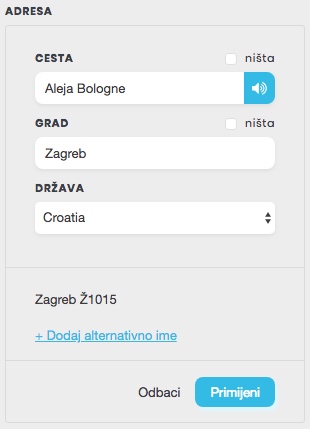
Within built-up areas the official name has to be set as primary name (e.g.: “Aleja Bologne”) and the road number (e.g. “Ž1015”) should be put in the alternative name field.
Outside of built-up areas it's exactly the other way round: the road number has to be set as primary name and any other local names (if available) should be put as alternative name.
City roads
As primary name the complete street name should be set (first letter as a capital letter, exactly like on the sign) e.g.: “Ilica”, “Grada Vukovara”, “Slavonska avenija”, as alternative names may be put other names by which that street is known.
- 1. example:
- PN:
Grada Vukovara - AN:
Vukovarska
- PN:
- 2. example:
- PN:
Fra Andrije Kačića Miošića - AN:
Kačićeva
- PN:
The word "Ulica" (or abbreviated "Ul.") is omitted from the name. This does not apply to "cesta", "avenija", "put", "odvojak" etc., when that word is part of a name, e.g. “Gagarinov put” or “Nova cesta”.
Parking (lot) roads
Normal parking lots within built-up areas should not be named (Street = "none"), you just have to put in the right city name.
Service Areas
Service Areas (Croatian: Odmorište) are classified as "Parking lot roads". Exits and entrances to the Service Area are classified as "ramps". Exits are named like normal ramps (see chapter "Ramps"), the Service Area itself and the entrance to the Service Area are named by their real name.
- Example:
- Street:
Odmorište Sv. Križ Začretje zapad - City: none
- Country:
Croatia
- Street:
Railroads
|-|-|-|-|-|-|-|-|-| Railroad |-|-|-|-|-|-|-|-|-|
- The "city" field should be set as 'none' and the "Street" field as
HŽ - Direction is "unknown"
- Level "Ground"
- At railroad crossings you should create a junction with the road
- Do not map single tracks!
Road types
| Waze categorisation | Road | Lock level |
|---|---|---|
| Freeway/Motorway | Autocesta (Freeway) with the number Axx (one- or two digits) | L5 |
| Major Highway | Državna cesta (State roads) with the number Dxxx (one to three digits) | L3 |
| Minor Highway | Županijska cesta (County roads) with the number Žxxxx (four digits) | |
| Primary street | Lokalna cesta (local road) with the number Lxxxxx (five digits) and unclassified roads carrying heavier traffic | L2 |
| Street | Urban Streets, low traffic rural roads | L1 |
| Off-road | Unsurfaced road which is often impassable for normal cars and only suitable for 4x4 vehicles. | |
| Parking (lot) road | Roads within a car park, or other places where we don't want Waze to monitor speed and potentially generate a traffic jam report, in particular petrol station forecourts. | |
| Private road | Road with no access for the general public, public roads with legal prohibition on through routing in both directions (private road sign, no motor vehicles except for access sign, or a closable gate). | |
| Ramp | Ramp segments should be used when mapping grade-separated junction and at major junctions | Axx: L5 Dxxx or Žxxxx: L3 |
Non-drivable - aren't really worth adding, as Waze is an app aimed at commuters who drive, but if you really feel the need to add these, be careful and make sure that they DO NOT connect to drivable roads as Waze has been known to route people along walking trails and the like!
Speed limits
All speed limits in Croatia are shown using circular signs with a red border and black text. These can be checked using external sources such as StreetView, however note should be taken of the age of images.
Waze does not support speed limits for different vehicle type so all speed limits should be set to that applicable to Cars, Motorcycles, and Vans. You can not mark a segment as being covered by the National Speed Limit. Instead you must add the numerical limit that applies to that road type.
Standard speed limits:
- built up areas: 50 km/h
- outside bulit up areas: 90 km/h
- expressways: 110 km/h
- motorways/freeways: 130 km/h
Speed limits, which should not be entered to the map, are temporary, time-based and minimum speed limits.
Direction
Two-way, one-way or unknown. Unknown is exactly that, and NOT no-entry.
Elevation
Used when 2 roads cross at different levels, like a bridge or overpass, and there is no junction.
Dual carriageways
A dual carriageway is a road which has a central reservation to separate the carriageways. This means 1 or more lanes in either direction. A road should be split into 2 one-way segments if any of the following conditions are met:
- The central reservation is wider than 5 metres
- There's a visible gap between average of all GPS traces
- It is split by physical barrier (Concrete, Armco, pedestrian barrier etc.)
Pedestrian refuges and painted road separation (cross hatching that can be driven over) should not normally be split. These usually need merging to be a single two-way road.
Creating new roads
- Click on the "+" button at the top, and select "Road".
- Draw the new road in, using the aerials or GPS traces.
Each mouse click will add a corner to the road. Double-click to finish.
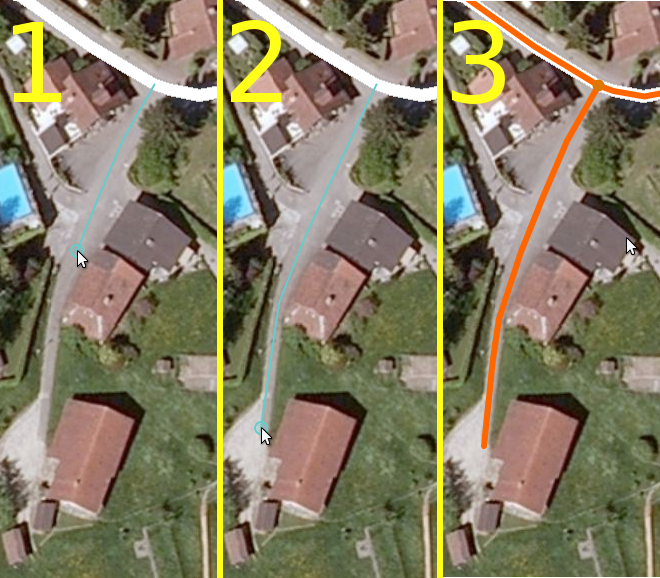
- When drawing from or to an existing road, a junction will be created automatically.
- The default is one-way, in the direction you drew. You can change this once you have finished.
- Select the correct road type. Please refer top the table above.
- Set the correct direction.
- Adjust the elevation, if necessary. Default is Ground.
- Make sure you have set all the correct turns for each segment.
(Remembering to set the turns from any existing roads you may have linked to.)
- Make sure that cul-de-sacs have a node at the dead end, not a loop or roundabout, otherwise Waze can't route into the street.
- Click on "Address" to name the road. It is important that the Street and City names are set to make it searchable in Waze. Check the City names of nearby roads to make sure you don't add a new City to the map! If you're not sure at this stage or the road has no name, tick the "None" boxes or it will appear on the map as a red line, and Waze may not be able to use it.
Roundabouts
Not all round roads are roundabouts. Although there are rare exceptions in our areas, when mapping you must take care whether or not this really is a roundabout.
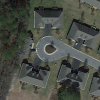
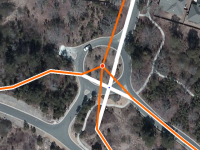
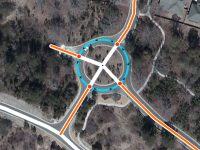
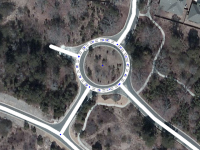
Creating a roundabout
The roads that will be included in the roundabout must first be connected at one point. If we skip this, the roundabout will be faulty. The turn arrows should not be placed, as they are irrelevant for this procedure. Use the "Road" icon from the editor to select "Roundabout". Instead of the usual mouse arrow, a cross will appear. Place the cross at the intersection of the roundabout and drag the circle with the left mouse button to the right size. When we release the mouse, the roundabout will be created, the road sections that were inside the circle will be deleted, and the directions of traffic will be set automatically.
If we made a mistake, we can undo the action by clicking the left arrow in the top editor bar (“Undo”). However, once we click on the diskette icon, the change becomes definitive and can no longer be undone.
If we map roundabouts without a name (or “None”), they will remain red with incorrect visibility on mobile devices. So, be sure to enter the city and street, or in exceptional cases select "None"!
Trick: Holding the Shift key while creating a roundabout will create an ellipse-shaped roundabout.
Exits and entrances
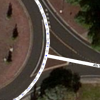
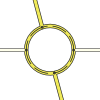
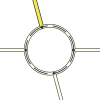
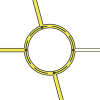
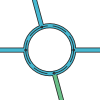
On smaller roundabouts (diameter less than 10-15 meters), it is recommended to avoid drawing islets (“Y” structures) for clarity. Use two-way roads instead, or increase the roundabout to a radius of 15 meters.
Choosing the right road type
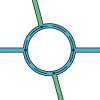
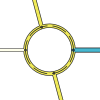
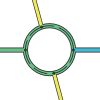
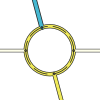
Roundabouts, as well as roads, should have a defined type of road (Street, Primary Street, Minor Highway, etc.), according to the table below:
Junctions
As with all mapping in Waze, all types of junctions should be drawn as simply as possible to give clear instructions. At this time Waze does not give lane guidance and adding additional segments at junctions can lead to complex and confusing instructions and the possibility of introducing errors.
T-junctions, cross roads, and the majority of junctions are usually best mapped as single 2-way segments that are connected with a single node. Complex junctions that include restrictions, large (distinct) turn lanes may benefit from a more complicated layout.
The original map import, know as the basemap, had a lot of junctions mapped as split 1-way roads due to little more than some painted chevrons in the middle of the road. This is completely unnecessary, and any remaining should be simplified where possible.
-
Basemap junction
-
Simplified junction
Special style junctions
Y junction
At Y junctions it is important to pay attention to how they were created to get the correct instructions. Segment names and geometry are very important.
In the following example, the multi-lane road is called "Main Street" to the west and "Atlantic Avenue" to the east. The name change takes place at the intersection where "Main Street" separates.
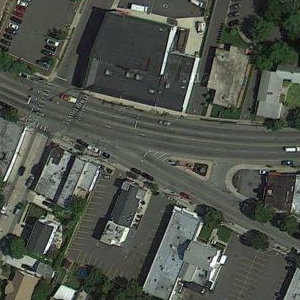
The description above represents approximately how the situation unfolds. But as the picture shows, the technical description would be that "Main Street" continues straight and they separate from "Atlantic Avenue." But if we map them like that, we produce a problem.
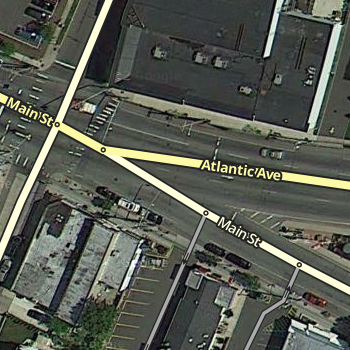
As both segments of "Main Street" have the same name, the routing server assumes that it is "continuing straight ahead", as can be seen here from the satellite image. If the two segments are now a straight line, we reinforce the assumption that "Main Street" in "Main Street" must be "straight ahead."
But the "straight ahead" in our case is from "Main Street" to "Atlantic Avenue." It means continuing regardless of the name change. That the routing server can understand the situation, we need to adjust the geometry of the segments. The result is shown in the following photo:
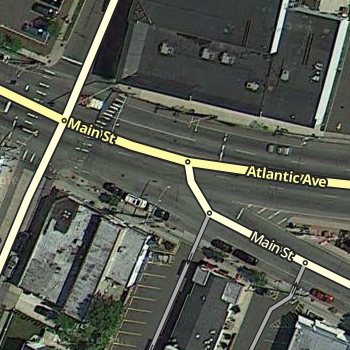
On the multi-lane road, we made the crossing at an intersection, at an angle of almost 0 degrees. Main Street separates at an angle of 90 degrees. The routing server should now also know that there is a diversion here. The result is that you now turn from Main Street to Main Street exactly as the driver would expect on the road.
Triangular junction
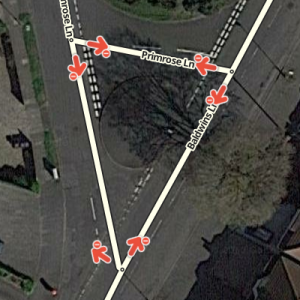
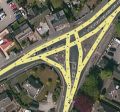
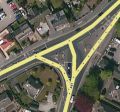
We have quite a lot of triangle junctions. Some of them are so small they have nothing more than a few square metres of grass in the middle and can usually be simplified into T-junctions.
If they're left as triangles, they can be problematic. For any route through the junction, there are 2 possibilities: the "sensible" route following one side of the triangle; and the "silly" route following 2 sides. Because the triangles generally aren't very big, GPS accuracy isn't good enough to distinguish which route a driver actually takes. So if Waze decides a silly route is faster, then for most drivers who ignore it and take the sensible route, Waze will still think they've gone the long way round and reinforce that route.
If a triangle is large enough to be mapped (e.g. has a large amount of grass or a tree on it), then restrict all internal turns to force Waze to use the sensible route through these junctions.
Turn instructions
If you follow a few basic rules when working on turns, it is much easier to predict the behavior of junction navigation:
| Turning angle | Span | Road type | Instruction |
|---|---|---|---|
| 22° | 0°-44° | Everything except ramps, Major/Minor Highways, Freeways | Keep left / Keep right |
| ramps, Major/Minor Highways, Freeways | |||
| Keep left / Exit left | |||
| 90° | 45° - 150° | All | Turn left / Turn right |
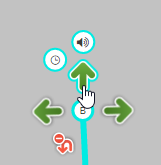
Turn Instruction Overrides are an additional way of forcing or canceling announcements and applying them only when needed. There is no reason to override existing structures such as Wayfinders.
| Before you set a Turn Instruction Override, it is highly recommended that you consult with a Country Manager or other senior editor. |
- Waze selected = instruction is not forced, according to the segments and their rules
- None = no instruction
- Turn left
- Turn right
- Keep left
- Keep right
- Continue = for "continue straight ahead"
- Exit left
- Exit right
- Uturn
Turn lanes
First of all: never map the turn lanes as ramps. Turn lanes have the lowest road type of all oncoming roads (e.g., if one "Primary Street" intersects with a "Major Highway", then the turn lanes are "Primary Street" segments).
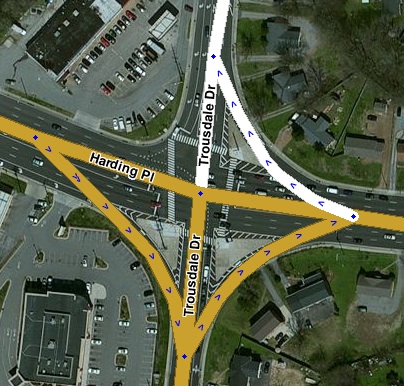
The turns and links need not be named as they will indicate the street name that link leads to when navigating. Only the name of the city should be entered and the name should be ticked 'none'.
Before you create a turn lane, make sure you really need it.
U turns
 : only at intersections, where turning is possible in one move without endangering oneself or others
 : in 99.9% of cases, especially if they are cul-de-sac
Loops
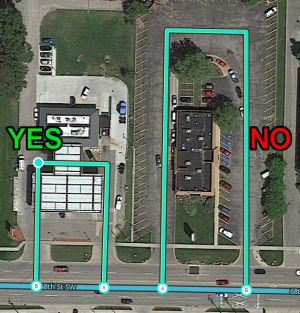
The loop usually leads back in one way from the starting point. Each loop must consist of at least 3 segments!
Otherwise, it may cause routing problems. Therefore, for loops of less than 3 segments, more "intersections" must be added. Many new editors say these intersections in the loop are redundant and therefore delete them (wrongly).
Speed cameras
Permanent cameras are recorded via the WME.
There are
For the cameras to be displayed in the map editor, the appropriate layer must be turned on. To do this, click ![]() in the upper right corner and select "speed cameras".
in the upper right corner and select "speed cameras".
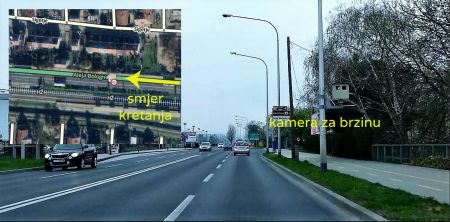
The following points must be applied when editing the camera:
- The location can be moved within the radius shown and entered more precisely on the map
- The direction is determined by the red dot. The point must be in the direction of travel, as if the camera is taking pictures from behind
- Important: Place the red-light camera directly at the stop line. With a speed camera, it is recommended that you set it to the actual location of the camera
- At red-light cameras, the speed is set at 0km/h
- At speed cameras the maximum speed is set
- The cameras are automatically locked to the editor level of the last editor. A lower-ranking editor cannot change or delete the camera
Note: An in-app visual alert is always displayed when approaching the camera. Audible alerts are issued when the maximum speed limit is exceeded.
| Description | Photo |
|---|---|
| Radar speed signs | 
|
| Surveillance cameras and webcams | 
|
Places
Places are points of interest and should only be mapped if they are a useful destination or help drivers find their bearings.
| Before adding a place please make sure, that the place does not already exist on the map by activating the "Places" layer. |
Places come in 2 forms:
- Point Places - These are not visible in the App but are searchable. Examples - convenience store, takeaways, car wash, bank, coffee shop.
- Area Place - These are shown in the App and are searchable. Examples - supermarkets, retail parks, airports, golf course, parks, lakes. Overuse of Area Places can clutter the map and make identifying individual landmarks difficult.
Only actual "land marks" should be mapped as areas, i.e. those which help the driver to find their bearings. Other businesses or addresses should be mapped as points.
Location details
Every place, whether point or area, should have as much detail completed as possible. This includes a name, proper categorization, and full street address, city, and state. If any place does not have a city or street in its address, check the None checkbox next to these fields.
"General" tab
The General tab for a place is where basic information is added: address, name, category, description, entry points, lock, point or area, external providers, residential or public.
Places considered fundamental to the functioning of the Waze app, such as gas stations, should be locked at least to rank 2 to prevent possible loss of data due to automatic acceptance of submissions from trusted users. Other complex, intricate, or crucial places such as police stations, fire departments, airports, parks, etc., should also be considered for locking to prevent loss of data.
Categories
Choose only categories that closely match the destination! If no subcategory provides a very close match, do not select a subcategory that "comes close". Instead, select a relevant umbrella supercategory or the Other category.
This approach may seem counterintuitive from an editing perspective. This is because editors begin with the place and search for the category. Drivers, however, will begin with the category and search for the place.
Name
In order to ensure a unique naming, you need to inform yourself on the website of the appropriate place. For retail chains, "d.o.o." does not belong in the name. If there are more than one branch in a city, the city district or street must be entered next to the name (e.g. Konzum ZG-Maksimir). Otherwise, the city is only entered in the address, so it will show up in search anyway.
Some examples:
- Bauhaus
- bauMax
- BIPA
- dm drogerie markt
- Emmezeta
- Kaufland
- Konzum
- Kozmo
- Lesnina XXXL
- Lidl
- Lonia
- McDonald's
- Mömax
- NTL
- Pevec
- Plodine
- Spar
- Tesla Supercharger ime grada
- Tisak
- Tommy
- ...
Train / bus stations:
At stops, an "S" should be placed in front of the name. It is also useful to include all the passing lines in the description. As there is no separate category, in this case "Railway Station" is taken.
Description
One thing in advance: Do not use the "Description" field for notes to other editors. This field is visible in the app and should only contain information that is actually related to the location.
For the Tourist Attraction / Historic Site category, this note should also be entered in English as a special service for non-Croatian visitors, as this category is expected to be especially popular for tourists.
Here are two examples with completed information:
"More Info" tab
Web site
Gas stations: At gas stations, the website must be listed as follows: http://go.hak.hr/917335202 This gives us unique, comprehensive and up-to-date information on gas stations. The linked site offers even more advantages in the search for the cheapest gas station.
Phone number
To ensure consistency, telephone numbers are entered as follows:
International calling code (+385 for Croatia) + area code + phone number
This looks like that:
- Zagreb number: +385 1 12345678
- Split number: +385 21 12345678
- Bjelovar number: +385 43 12345678
etc.
Services
Services help users decide if they should drive to a particular place. Here are descriptions of available services. Waze uses the same set of services for every place type. The service checkbox only has two states, 'yes' or 'no answered', thus there is no way to determine if a place either does not have a service or an editor hasn't added one yet.
"Photos" tab
This tab shows all the photos that users have associated with the location. Currently, in the WME photos can only be checked and deleted, adding is only possible through the app.
Determing acceptable photos
It is difficult to say in general which photos are acceptable. It also depends on the type of location. Generally speaking, only photos that assist the driver and clarify what and where his destination is should be accepted. The system also tries to show the user the most appropriate photo (Direction of access, time of day, etc.)
The following guidelines should be used by editors and users when taking / validating photos:
| Photos should... | Photos can... | Photos shouldn't... |
|---|---|---|
| show the external appearance of the location | show store entrances | show people (especially with recognizable faces). |
| have good quality and visibility (not blurred, not through rain or dirty car windows, not from moving cars / trains / etc.) | show front of house / main entrance with company names | show legible license plates |
| have proper lighting | show front and side views that clearly mark the right building | show anything else that allows you to associate a specific person with a photo / place |
| be able to differentiate the located location from the adjacent buildings | show street view with posters | show private buildings from the courtyard entrance |
| show pictures in daylight | show images in the evening or night, as long as the image shows something and can be used to identify the location |
Examples of suitable photos:
Examples of inappropriate photos:
Place Updates
Further Details
This page is only intended as a Quickstart and is not intended to answer all of your questions. If you only intend to add a few street names, or allow a turn, then this is aimed at you. Before you start any serious editing you need to read the Croatian Editing Manual.
For detailed explanation of how to use the Waze Map Editor, please read the WME Manual.
Should you still have questions after that search the forums, and if you still can't find an answer post a topic in the correct forum. You can also send an email to the Country or Area Managers.
Helpful links
- Geoportal with official street names
- Official list of all numbered roads by October 2017
- Update to the official list of all numbered roads by February 2018
- Lists and maps of roads by County Road Administrations (sorted by county)
- Bjelovar-Bilogora
- Brod-Posavina
- Dubrovnik-Neretva
- Istria
- Karlovac
- Koprivnica-Križevci
- Krapina-Zagorje
- Lika-Senj
- Međimurje
- Osijek-Baranja
- Požega-Slavonia
- Primorje-Gorski kotar
- Šibenik-Knin
- Sisak-Moslavina
- Split-Dalmatia
- Varaždin
- Virovitica-Podravina
- Vukovar-Srijem
- Zadar
- Zagreb
- City of Zagreb (no list available)
- List of all cities and municipalities
- All locations of speed/red-light cameras


